Introduction
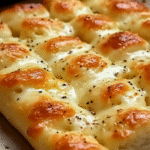
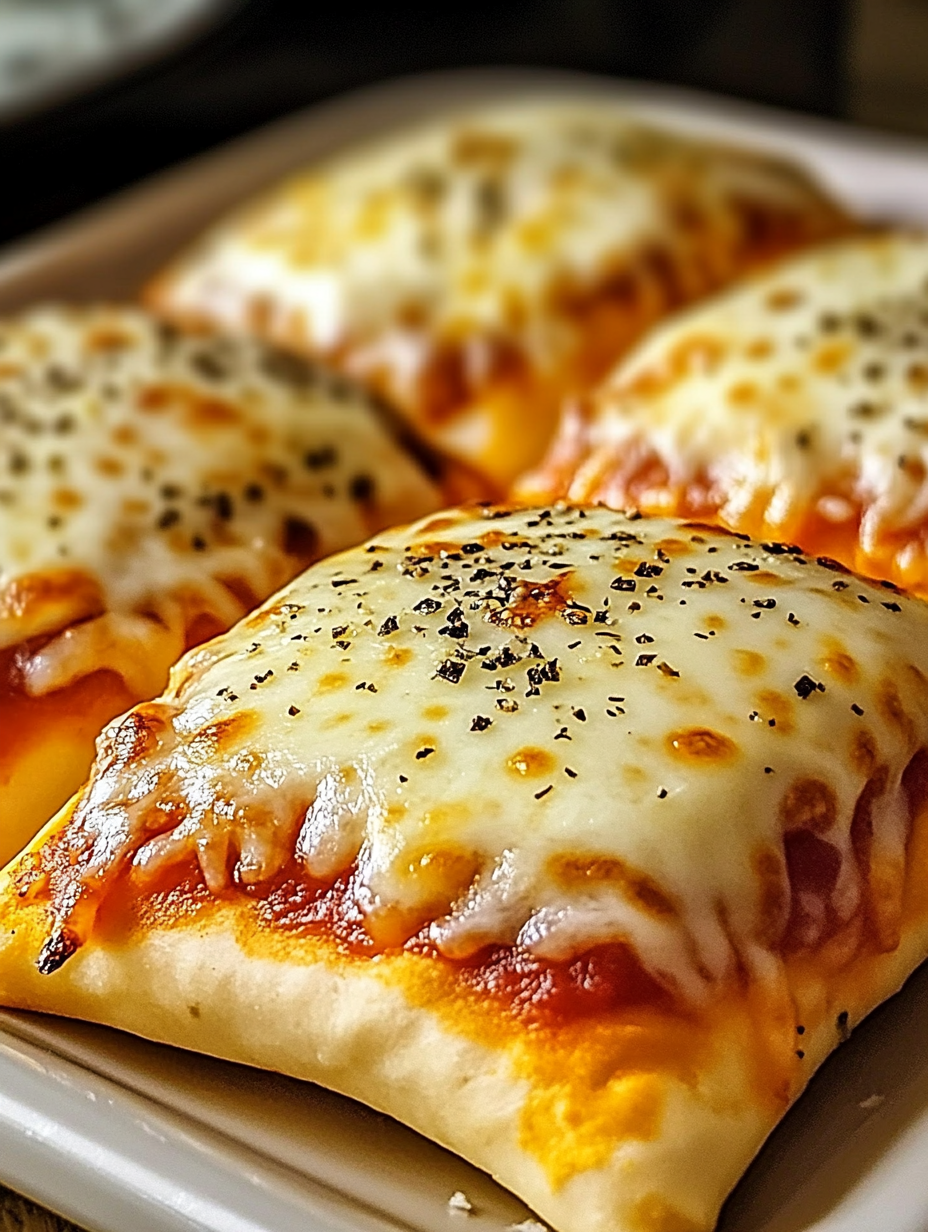
When I’m craving something cheesy, satisfying, and just plain fun to make, Homemade Easy Cheesy Pizza Pockets are my go-to. These golden, hand-held bundles of pizza goodness hit all the right notes—crispy crust, melty mozzarella, savory sauce, and your favorite toppings tucked inside. Whether it’s a weekend lunch, a game-day snack, or a kid-approved dinner, these pizza pockets never fail to satisfy.
What I love about this Homemade Easy Cheesy Pizza Pockets recipe is how approachable and customizable it is. You don’t need to be a pro chef or work with complicated dough. We use refrigerated or homemade pizza dough, stuff it with our favorite pizza toppings, then bake until golden and gooey. I first made this Homemade Easy Cheesy Pizza Pockets for a movie night at home, and the reaction was instant: everyone asked for seconds—and then thirds.
These pizza pockets are a creative way to get your pizza fix without the fuss of delivery or making a full pie. Plus, they’re portable, freezer-friendly, and perfect for school lunches, meal prep, or feeding a hungry crowd. Let’s dive into this foolproof, flavor-packed recipe that’ll become a staple in your kitchen just like it is in mine.
Perfect For:
- School lunches and snack boxes
- Quick weeknight dinners
- Game day or party appetizers
- Kids’ cooking activities
- Freezer meal prep
Why You’ll Love This Recipe:
- Super Cheesy: Loaded with mozzarella and other cheeses you love.
- Crispy and Golden: Baked until perfectly golden with a slight crunch.
- Totally Customizable: Add pepperoni, sausage, mushrooms, or any topping.
- Make-Ahead Friendly: Freeze and reheat for future meals.
- Kid and Crowd Approved: A fun and satisfying handheld meal.
Preparation & Cooking Time:
- Prep Time: 20 minutes
- Cook Time: 15–18 minutes
- Total Time: ~35–40 minutes
- Servings: 8 pockets
- Calories: ~310 per serving (varies by filling)
Ingredients:
- 1 lb pizza dough (store-bought or homemade)
- 1 cup pizza sauce
- 2 cups shredded mozzarella cheese
- ½ cup mini pepperoni slices (optional)
- 1 tsp Italian seasoning
- 1 tbsp olive oil
- ¼ cup grated Parmesan (optional)
- All-purpose flour, for dusting
Ingredient Highlights:
- Pizza Dough: Pre-made dough makes this recipe easy and quick.
- Mozzarella Cheese: Melts beautifully and creates that iconic cheesy pull.
- Pizza Sauce: Use store-bought or homemade.
- Toppings: Pepperoni, cooked sausage, mushrooms, peppers, or olives.
- Parmesan & Seasoning: Add flavor and a crispy finish on top.
Step-by-Step Instructions:
- Preheat Oven: Set your oven to 425°F (220°C). Line a baking sheet with parchment paper.
- Roll Out Dough: Lightly flour your surface and roll out the dough into a large rectangle. Cut into 8 equal squares.
- Assemble Pockets: On one half of each dough square, add 1–2 tablespoons of pizza sauce, a generous handful of cheese, and your desired toppings.
- Seal: Fold the other half over the filling and crimp the edges with a fork to seal.
- Brush with Oil: Brush each pocket with olive oil and sprinkle with Italian seasoning and Parmesan if using.
- Bake: Place pockets on the baking sheet and bake for 15–18 minutes, or until golden brown.
- Cool and Serve: Let them cool for 5 minutes before serving.
Serving Suggestions:
- Pair with a Simple Green Salad or Caesar Salad
- Balance out the savory richness of the breakfast pizza with a light green salad tossed in vinaigrette or a classic Caesar with crunchy croutons and parmesan. It’s a refreshing, fuss-free combo that works for brunch, lunch, or even a light dinner.
- Serve with Marinara or Ranch for Dipping
- Turn your English muffin pizzas into a hands-on, dip-friendly snack! Offer small bowls of warm marinara, ranch, or even garlic butter on the side. It’s great for kids, party guests, or anyone who loves interactive bites with bold flavors.
- Add to a Lunchbox with Fruit and Crackers
- These pizzas reheat easily and fit perfectly into meal prep containers. Pair one or two with apple slices, grapes, baby carrots, or crackers for a balanced, kid-friendly lunch. Wrap them in foil to keep warm or enjoy at room temp.
- Slice and Serve on a Party Tray
- Cut each muffin half into quarters and stack on a party platter for an easy-to-grab appetizer or brunch buffet item. Mix and match flavor variations to offer something for everyone — from spicy to veggie to meat lover’s style.
- Serve Alongside Soup for a Cozy Meal
- For a comforting and satisfying combo, pair your breakfast pizzas with a bowl of tomato soup, creamy potato leek, or roasted red pepper bisque. The crisp muffin base makes the perfect companion to warm, flavorful soup.
Additional Tips:
- Don’t overfill the pockets—they might burst during baking.
- Make sure edges are sealed well to keep the cheese inside.
- Use parchment to avoid sticking and easy cleanup.
- For extra crispiness, bake on a preheated pizza stone.
- Let kids customize their own fillings for a fun cooking activity.
Recipe Variations:
- Veggie Supreme
- Pack your breakfast pizza with color and crunch by topping it with diced bell peppers, sautéed mushrooms, red onion, and sliced black olives. Sprinkle with mozzarella or provolone for that gooey, classic flavor. It’s like your favorite supreme pizza — but morning-ready and meat-free.
- Meat Lovers
- Craving something hearty? Load it up with crumbled breakfast sausage, crispy bacon bits, and mini pepperoni. Use a mix of mozzarella and cheddar to bind it all together, and don’t be shy with the toppings — it’s a fork-and-knife kind of breakfast.
- BBQ Chicken
- Swap the marinara for BBQ sauce, then top with shredded cooked chicken, thin-sliced red onion, and a handful of sharp cheddar or Monterey Jack. Finish with a sprinkle of chopped cilantro after baking. It’s smoky, tangy, and totally satisfying.
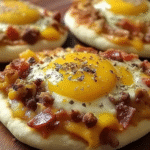
- Breakfast Style
- Lean into the breakfast theme by topping each muffin half with scrambled eggs, crumbled bacon, and shredded cheese. Add a spoonful of sausage gravy if you’re feeling indulgent. It’s like a full diner plate, all on one crispy muffin base.
- Spicy Kick
- Turn up the heat with sliced jalapeños, a few dashes of hot sauce, or a sprinkle of crushed red pepper. Pepper jack cheese adds the perfect creamy spice. Optional: finish with a drizzle of sriracha for extra fire.
Storage & Reheating:
Refrigerator
Once cooled, store your English muffin breakfast pizzas in an airtight container in the refrigerator for up to 3 days. These are ideal for quick grab-and-go breakfasts or next-day lunches. Just reheat and serve — no extra prep required.
- Pro Tip: If you’ve used juicy toppings like tomatoes or mushrooms, layer a paper towel in the container to absorb extra moisture and keep the muffins from getting soggy.
Freezer
These pizzas are freezer-friendly and perfect for make-ahead meal prep:
- Before Baking: Assemble the pizzas on a tray and freeze until solid, then transfer to a freezer-safe bag or container. Bake from frozen when ready — perfect for busy mornings.
- After Baking: Let them cool completely, then wrap each one individually in foil or parchment and place in a freezer-safe bag. They’ll keep for up to 2 months.
- Pro Tip: Label your bags with flavor variations and the date to keep things organized and stress-free.
Reheat
- Oven (Best Texture): Preheat to 350°F and bake for 10–12 minutes, directly on a baking sheet or toaster oven rack. This brings back the crispy muffin base and melty toppings.
- Microwave (Quickest): Place on a microwave-safe plate and heat on medium power for 1–2 minutes, flipping halfway through for even warming. For best results, wrap loosely in a paper towel to help maintain texture.
- Air Fryer Option: Heat at 325°F for 4–5 minutes for a crisp crust and bubbly top — perfect if you love a little crunch.
Equipment Needed:
- Rolling pin
- Baking sheet
- Parchment paper
- Pastry brush (for oil)
- Fork (to crimp edges)
FAQs (People Also Ask):
Can I freeze homemade pizza pockets before baking?
Yes! Assemble the pockets, place on a baking sheet to freeze until solid, then store in freezer bags. Bake straight from frozen, adding 5–7 extra minutes.
What kind of dough works best for pizza pockets?
Pizza dough (homemade or store-bought) works great. You can also use crescent roll dough or puff pastry for a different texture.
How do I keep my pizza pockets from leaking?
Make sure the edges are sealed tight with a fork, and don’t overstuff. Brush the tops with oil for a crisper, sealed crust.
Can I make these gluten-free?
Yes—just use gluten-free pizza dough and make sure all your fillings (sauce, cheese, etc.) are gluten-free.
What’s the best cheese to use for pizza pockets?
Mozzarella is classic, but you can mix in provolone, cheddar, or even pepper jack for extra flavor.
External Links:
Homemade Easy Cheesy Pizza Pockets
Ingredients
Method
- Preheat Oven: Set your oven to 425°F (220°C). Line a baking sheet with parchment paper.
- Roll Out Dough: Lightly flour your surface and roll out the dough into a large rectangle. Cut into 8 equal squares.
- Assemble Pockets: On one half of each dough square, add 1–2 tablespoons of pizza sauce, a generous handful of cheese, and your desired toppings.
- Seal: Fold the other half over the filling and crimp the edges with a fork to seal.
- Brush with Oil: Brush each pocket with olive oil and sprinkle with Italian seasoning and Parmesan if using.
- Bake: Place pockets on the baking sheet and bake for 15–18 minutes, or until golden brown.
- Cool and Serve: Let them cool for 5 minutes before serving.
Notes
Homemade Easy Cheesy Pizza Pockets – Helpful Tips
Cooking Tips & TechniquesUse store-bought pizza dough, crescent rolls, or biscuit dough for a time-saving shortcut—or make your own if you prefer!
Roll the dough slightly thinner than usual so it bakes evenly and crisps up without being too doughy.
Don’t overfill—1–2 tablespoons of sauce and toppings is plenty to avoid leaks or soggy bottoms.
Seal the edges well using a fork or by pinching tightly, and brush with egg wash or butter for that golden finish.
Bake on a parchment-lined tray at 375°F–400°F until puffed and browned, usually 12–15 minutes. Serving Suggestions
Serve with warm marinara or garlic butter dipping sauce on the side.
Pair with a crisp Caesar salad or roasted veggies for a simple meal.
Perfect for kids’ lunches, after-school snacks, or game day trays.
Add to a party platter with other finger foods like mozzarella sticks or meatballs.
Great with a side of ranch or spicy aioli if you’re feeling fancy. Make-Ahead & Storage
Make-Ahead: Assemble and refrigerate unbaked pockets up to 1 day ahead.
Refrigerator: Store baked pockets in an airtight container for up to 4 days.
Freezer: Freeze unbaked or baked pockets individually wrapped—bake from frozen or thaw overnight for best results.
Reheat: Reheat in a toaster oven or air fryer at 350°F for 5–7 minutes to restore crispiness. Tasty Variations to Try
Pepperoni Lover’s: Add mini pepperoni slices and extra cheese for a classic twist.
Veggie Supreme: Fill with sautéed mushrooms, onions, bell peppers, and spinach.
BBQ Chicken: Swap marinara for BBQ sauce and use shredded chicken, mozzarella, and red onion.
Breakfast Style: Fill with scrambled eggs, bacon, and cheddar for a savory morning treat.
Gluten-Free Option: Use a gluten-free dough or crescent roll substitute—still cheesy and delicious!
Conclusion
If you’re looking for a recipe that delivers comfort, fun, and serious cheesy goodness, Homemade Easy Cheesy Pizza Pockets are where it’s at. They’re fast, adaptable, and always a hit with both kids and adults. Whether you’re planning ahead for busy weeknights or pulling together snacks for a game-day gathering, these pockets come through every time.
I love making a double batch of Homemade Easy Cheesy Pizza Pockets and freezing them—they reheat like a dream and are a lifesaver on those “what’s for dinner?” nights. You get all the satisfaction of a classic pizza, wrapped up in a golden, crispy crust you can hold in one hand. Trust me, this recipe will quickly become one of your favorites.
So preheat that oven, get your fillings ready, and let’s make something ridiculously tasty. And hey—if you post your creation, be sure to include me in your post. I’d love to see how your pizza pockets turn out!