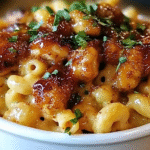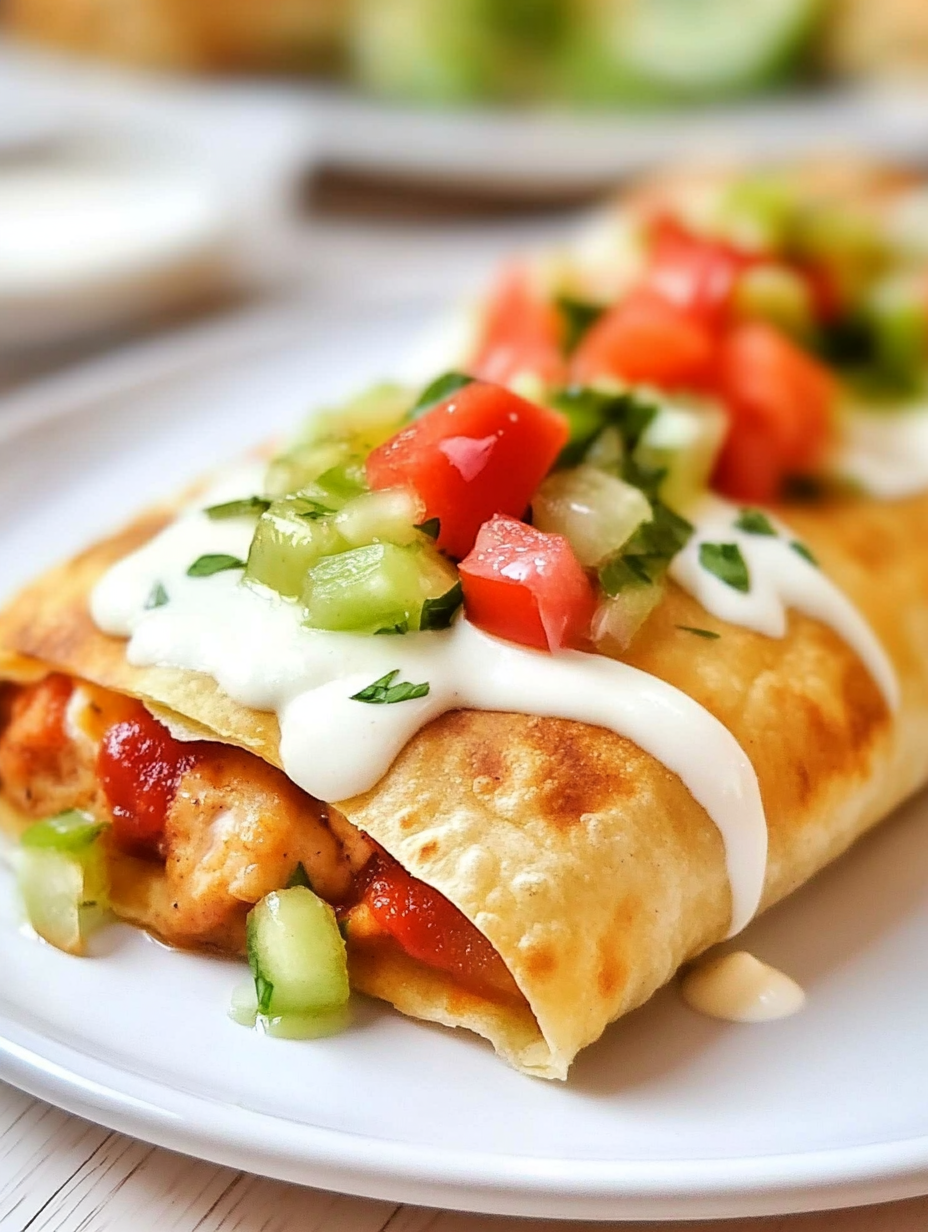
Let me paint the scene: it’s a busy weeknight and you’re craving something bold, crispy, and utterly satisfying. Cue the Chicken Chimichangas—a golden, handheld delight stuffed with seasoned shredded chicken, melted cheese, and savory spices, all wrapped in a tortilla and baked or pan-fried to crunchy perfection. These chimichangas hit the spot whether you’re after Mexican chicken chimichangas flavor or just want that Tex-Mex comfort without the fuss.
I stumbled onto this recipe one night when I had leftover rotisserie chicken and an itch for something crunchy yet effortless. I stuffed tortillas with chicken, cheese, salsa, and aromatics, brushed them lightly and baked them until they rivaled anything you’d get in a restaurant. My friends called it “crispy chimichangas that taste gourmet,” and I realized I’d unlocked a new go-to meal. It’s quick enough for weeknights, impressive enough for guests, and comforting in every bite. Whether you’re making chicken chimichangas recipe for the family or whipping up easy homemade chimichangas for yourself, this dish never disappoints.
What’s on the Plate
Overview
Cuisine: Mexican‑American Fusion
Course: Main Dish, Dinner
Prep Time: 20 minutes
Cook Time: 25 minutes
Total Time: 45 minutes
Servings: 6 chimichangas
What’s in Every Bite (per chimichanga)
Calories: ~450 kcal
Carbs: 35g
Protein: 25g
Fat: 25g
Sugar: 4g
Sodium: 920mg
Fiber: 3g
Total Recipe Cost (Approximate)
Total Cost: ~$14 USD
Per Serving: ~$2.30
Main Cost Factors: chicken, tortillas, cheese
The Story Behind the Flavor
Chimichangas trace their roots to Sonora, Mexico, and gained fame in Tucson, Arizona, in the 1940s—a delicious spin on burritos that are deep-fried until crispy. Over time, they became icons of Tex-Mex cooking for their mix of crunch, warmth, and cheesy goodness. This baked version retains that nostalgic crunch but swaps frying oil for a healthier oven-bake method.
We make this version by mixing shredded chicken with cheese, salsa, cream cheese, and spices, then wrapping it tightly in flour tortillas. A quick brush of oil and a trip through the oven creates a shell that’s crisp outside and melty inside. This is creative evolution meeting convenience—“crispy chicken chimichangas without deep frying” at its best.
Perfect For
- Quick weeknight dinners
- When the day’s been long and your energy’s running low, this dish comes to the rescue with minimal effort and maximum flavor. Just toss it together, bake, and boom—dinner’s served.
- Easy Mexican family meals
- It’s got all the Tex-Mex vibes your crew craves—cheesy, saucy, and satisfying—with none of the takeout price tag. The kind of meal that disappears fast around the table.
- Oven-baked chicken chimichangas fans
- Love the crispy outside and melty inside of restaurant-style chimichangas? This version dials it in with oven-baked ease, no deep fryer in sight.
- Leftover rotisserie chicken reinvention
- Got half a rotisserie bird hanging out in your fridge? Transform it into a spicy, cheesy flavor bomb that tastes like a totally new dish.
- Party appetizers or game-day snacks
- Cut them smaller and you’ve got crowd-pleasing finger food that’s hot, handheld, and totally addictive—perfect for watching the big game or feeding a house full of friends.
- Easy meal prep that reheats well
- Make a batch now, and enjoy all week. These hold up beautifully in the fridge and reheat like champs—crispy outside, juicy and cheesy inside. Great for grab-and-go lunches or quick solo dinners.
Why You’ll Love This Recipe
- Fast and customizable
- Dinner on the table in under 30 minutes? Yes, please. Whether you’re using leftover rotisserie chicken or cooking from scratch, this recipe flexes to fit your fridge. Add beans, swap cheeses, spice it up—or tone it down. It’s your kitchen, your rules.
- Cheesy, flavorful filling in every bite
- Every chimichanga is packed with creamy chicken, bold spices, and melty cheese. We’re talking flavor bombs wrapped in a tortilla. No bland bites here—just ooey-gooey satisfaction from edge to edge.
- Crispy, golden shell without deep frying
- Forget the mess (and stress) of frying. A brush of oil and a hot oven gives you that glorious crunch without the grease. Golden, crispy perfection—straight from your oven.
- Perfectly balanced between savory, creamy, and spicy
- This dish hits all the right notes. Savory chicken, creamy cheese, a kick of spice from salsa or chilies—it’s a party in your mouth that doesn’t overpower.
- Ideal for reheating or freezer-friendly meals
- Make extras and thank yourself later. These chimichangas reheat beautifully—oven, toaster oven, or air fryer. Or freeze them for a future dinner that tastes just as good as day one. Total weeknight win.
Ingredients You’ll Need
Core Ingredients
- 3 cups shredded chicken (rotisserie or cooked breast)
- 1 cup shredded cheddar or Monterey Jack cheese
- ½ cup cream cheese, softened
- ½ cup salsa (red or green)
- 1 tsp chili powder
- ½ tsp ground cumin
- ½ tsp garlic powder
- Salt and pepper to taste
- 6 large flour tortillas (10‑inch)
- 2 tbsp oil or melted butter (for brushing)
Optional Toppings
- Sour cream or Mexican crema
- Guacamole or sliced avocado
- Fresh cilantro
- Pico de gallo
- Sliced jalapeños or hot sauce
Ingredient Highlights
Shredded Chicken: Leftover rotisserie chicken makes prep fast and flavorful.
Cheeses: The combo of cheddar and cream cheese ensures gooey, satisfying filling.
Salsa & Spices: Adds tang, moisture, and depth—perfect for homemade chimichanga filling.
Tortillas & Oil: Create a crisp yet tender wrap without deep frying.
Step-by-Step Instructions
- Preheat oven to 400°F (200°C). Lightly grease a baking sheet.
- In a bowl, mix chicken, cheeses, salsa, and spices until well combined.
- Lay tortillas flat, spoon ~¾ cup filling onto each. Fold in sides, roll tightly, and brush with oil.
- Place seam-side down; bake 20 minutes, flip, brush, and bake another 5–7 minutes until golden.
- For extra crunch, pan-fry each chimichanga briefly before baking.
- Serve hot with your favorite toppings.
Pro Tips
- Warm tortillas in the microwave to make folding easier
- Cold tortillas crack like bad jokes at a dinner party. Wrap them in a damp paper towel and microwave for 20–30 seconds until they’re soft and pliable. It’ll make folding a breeze and keep your chimis from splitting.
- Don’t overfill: makes rolling cleaner and prevents bursting
- Resist the urge to pack ‘em like a suitcase before vacation. A moderate scoop of filling (about ⅓ cup) keeps the roll tight and helps everything stay inside during baking. Mess-free = stress-free.
- Keeping seam-side down helps seal and crisp evenly
- Once your chimichangas are rolled, always place them seam-side down on the baking sheet. This locks them shut and ensures they crisp up without unraveling like a burrito gone rogue.
- Pan-fry the ends for added crunch before baking
- Want that extra golden, restaurant-style finish? Give the ends a quick sear in a hot pan before baking. It’s like giving your chimichangas little crunchy boots—they’re dressed to impress.
- Save time by shredding warm chicken—it pulls apart faster
- Don’t wait until your chicken cools to shred it. While it’s still warm, grab two forks (or a stand mixer if you’re feeling fancy) and shred away. The warmer it is, the smoother and quicker it goes.
Recipe Variations
- Oven-Baked Chicken Chimichangas
- This is your go-to base recipe — golden, crispy edges straight from the oven without the deep-fryer mess. Brush with oil or melted butter before baking for that extra crunch factor.
- Crispy Chimichangas
- Want more crunch in your bite? Lightly fry your rolled chimis in a skillet with a little oil until golden on all sides. It’s still less greasy than deep frying, but gives that irresistible restaurant-style finish.
- Cheesy Chimichanga
- Calling all cheese lovers! Stir in ½ cup of softened cream cheese or shredded pepper jack into the filling before rolling. You’ll get an ultra-creamy, melty center that oozes with every bite — queso heaven.
- Texas-Style Chimichangas
- Add a scoop of cooked rice (Mexican, cilantro-lime, or plain) to each tortilla before rolling. It turns your chimichanga into a full meal-in-one, with extra bulk and bold Southwest vibes.
- Family-Friendly Version
- Tone down the spices, skip the jalapeños, and let the kids top theirs with sour cream or shredded cheese. You can even serve the fillings deconstructed taco-style for picky eaters who don’t like surprises inside.
- Breakfast Chimichangas
- Swap the chicken for scrambled eggs, breakfast sausage, and hash browns. Wrap, bake, and dunk in salsa for a savory morning treat that’s like a breakfast burrito in crunchy disguise.
- Vegetarian Chimichangas
- Replace the chicken with a combo of black beans, sautéed peppers, onions, and corn. Add a little cumin or taco seasoning for flavor, and you’ve got a plant-powered powerhouse of a meal.
- Fiesta-Style Chimichangas
- Top your baked chimis with guacamole, pico de gallo, shredded lettuce, and a drizzle of chipotle sour cream. Now you’re serving a full-on fiesta on a plate!
Gluten-Free Version
These chicken chimichangas can be totally gluten-free with just a few mindful swaps — no flavor sacrificed!
Start by using certified gluten-free tortillas — many brands offer soft corn or gluten-free flour options that roll beautifully. Then do a quick label check on your shredded cheese, cream cheese, and especially your salsa — some store-bought varieties sneak in thickeners or additives that contain gluten.
And don’t forget: if you’re using any seasoning blends or spice packets, make sure they’re gluten-free too (taco seasonings are sneaky like that). With these small checks, you’ll be digging into cheesy, crispy, totally gluten-free chimichangas that taste just like the original — if not better.
Kid-Friendly Version
Turn these chimichangas into a total win with the little ones — it just takes a few simple tweaks!
Start by using a mild, melty cheese like Colby Jack, mozzarella, or mild cheddar to keep flavors kid-approved. Skip the hot salsa and go for a smoother, sweeter version — or just use a mild tomato sauce instead.
Slice the chimichangas into halves or even quarters so they’re easier for small hands to hold (and way more fun to dip). Speaking of dipping — kids love variety! Serve them with small bowls of ranch, sour cream, ketchup, or mild queso for a playful, interactive meal. You can even let them help wrap their own chimichanga for bonus kitchen fun.
Chicken Chimichangas
Ingredients
Method
- Preheat oven to 400°F (200°C). Lightly grease a baking sheet.
- In a bowl, mix chicken, cheeses, salsa, and spices until well combined.
- Lay tortillas flat, spoon ~¾ cup filling onto each. Fold in sides, roll tightly, and brush with oil.
- Place seam-side down; bake 20 minutes, flip, brush, and bake another 5–7 minutes until golden.
- For extra crunch, pan-fry each chimichanga briefly before baking.
- Serve hot with your favorite toppings.
Notes
Chicken Chimichangas – Helpful Tips
Cooking Tips & TechniquesUse shredded rotisserie chicken or leftover cooked chicken to save time—mix it with spices, cheese, and a touch of salsa for a flavorful filling.
Warm your tortillas before filling to prevent cracking when rolling.
Roll tightly, tucking in the sides burrito-style, and secure with a toothpick if needed before cooking.
For that crispy golden shell, either shallow fry in hot oil (350°F), brush with oil and bake at 425°F, or air fry at 400°F for 8–10 minutes.
Don’t overfill! ⅓ to ½ cup of filling per tortilla gives the perfect fold and cook-through. Serving Suggestions
Top with sour cream, guacamole, shredded lettuce, chopped tomatoes, or a drizzle of queso blanco.
Pair with Mexican rice, refried beans, or a fresh corn salsa for a full Tex-Mex plate.
Serve with lime wedges and a cold Mexican soda or horchata for the ultimate combo.
Slice in half and stack for fun party platters or serve whole for hearty dinners.
Garnish with chopped cilantro or green onions for fresh color and flavor. Make-Ahead & Storage
Make-Ahead: Prepare and roll chimichangas in advance. Store covered in the fridge and cook fresh when ready.
Refrigerator: Store cooked chimichangas in an airtight container for up to 4 days.
Freezer: Freeze unbaked or fully cooked chimichangas for up to 2 months. Wrap individually in foil and store in a zip-top bag.
Reheat: Reheat in the oven or air fryer to restore crispiness—avoid microwaving unless you’re okay with softer texture. Tasty Variations to Try
Beef or Pork: Swap chicken with shredded beef barbacoa or pulled pork for a rich flavor twist.
Creamy Jalapeño: Add chopped jalapeños and cream cheese to the filling for a spicy, creamy upgrade.
Breakfast Style: Fill with scrambled eggs, bacon or sausage, and cheese for a morning chimichanga!
Veggie Lover’s: Use sautéed peppers, onions, mushrooms, and beans for a meatless version.
Cheesy Fiesta: Double the cheese and add queso inside and out for an ultra-melty bite.
Taste What’s Next
BBQ Pineapple Chicken Kabobs
20 Minute Mini Baked Chicken Tacos
One-Pan Creamy Parmesan Chicken & Rice
or you Can Dig Deeper Recipes by clicking this: Appetizer, Breakfast, Lunch, Dinner, and Desserts.
Storage & Reheating
Got leftovers? These chimichangas hold up like champs — and they’re even better when you know how to store and reheat them the right way.
Refrigerator: Let the chimichangas cool completely before storing. Pop them into an airtight container or wrap them tightly in foil or plastic wrap. They’ll stay fresh in the fridge for up to 4 days — perfect for next-day lunches or busy weeknights.
Freezer: Want to make a big batch ahead of time? No problem. Wrap each chimichanga individually in foil or parchment, then place in a zip-top freezer bag. Freeze for up to 2 months. When ready to eat, just thaw in the fridge overnight or bake straight from frozen (see below!).
Reheat:
- Oven or Toaster Oven (Best): Bake at 375°F (190°C) for 10–15 minutes until hot and crispy. If frozen, add 5–7 more minutes.
- Air Fryer (Extra Crispy): Reheat at 375°F for 5–7 minutes — the shell gets beautifully golden.
- Microwave (Quickest): Not as crispy, but it works in a pinch! Reheat on a plate covered with a damp paper towel for 1–2 minutes, flipping halfway.
Pro Tip: If the filling seems a little dry, drizzle a spoonful of salsa or sour cream on top before serving — flavor boost unlocked!
Equipment
- Large mixing bowl
- Baking sheet
- Pastry brush
- Skillet (optional)
- Spatula, tongs, and knife
FAQs
How to make chicken chimichangas at home?
Combine shredded chicken, cheese, cream cheese, and salsa with spices. Wrap in tortillas, brush with oil, and bake until crispy and golden.
What’s the best way to get crispy chimichangas without frying?
Brush tortillas with oil or butter and bake in a hot oven. Optionally pan-fry one side for extra crunch before baking — no deep frying needed.
Can I use leftover rotisserie chicken for chimichangas?
Absolutely! Using leftover chicken makes this easy homemade chimichangas recipe faster and full of flavor.
What toppings go best with chicken chimichangas?
Toppings like sour cream, guacamole, pico de gallo, and fresh cilantro add freshness and contrast to the crispy, cheesy content.
Are chimichangas Mexican or Tex-Mex?
Chimichangas are Mexican-American or Tex-Mex in origin. Though based on Mexican fried burritos, they rose to fame in the U.S. after being popularized in Arizona.
External Resources
CDC – Safe Handling of Poultry
Nutrition Info for Tortillas
Conclusion
These Chicken Chimichangas are crisp, cheesy, and designed to win dinner. I love that they transform leftovers into an elevated dining experience and come together with minimal effort. They’re perfect for cozy meals, family nights, or impressing guests with bold flavors and easy prep.
I’ve lost count of how many times this recipe has saved the night—crispy, melty, and oh so satisfying. Bake them, top them, devour them. And when you do, tag me or mention me in your post—I want to see your crispy chimichanga creations in action!