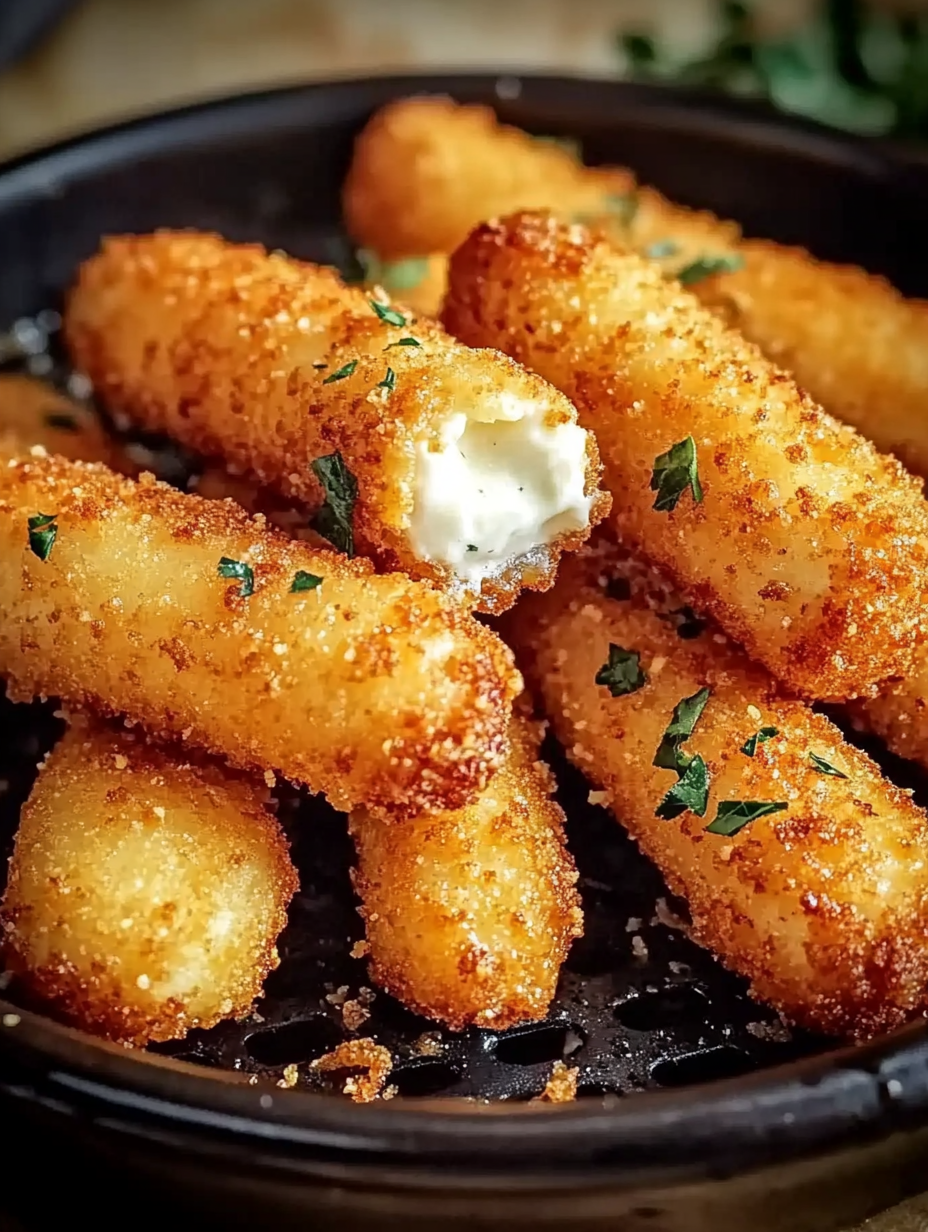
If there’s one snack that makes me feel like the queen of after-school treats, it’s Air Fryer Mozzarella Sticks. I mean, come on—gooey, stretchy cheese wrapped in a golden, crispy coating that practically begs to be dunked in marinara. These little beauties taste like something straight out of a restaurant basket, but the best part is you can whip them up at home with way less oil and way more fun. Trust me, when I set these down on the table, I don’t even get the chance to blink before the kids (and, let’s be honest, my husband too) swoop in like seagulls at a beach picnic.
I love that air fryer mozzarella sticks give me all the crunchy, cheesy satisfaction of the deep-fried version without the heavy grease. And because I get to control the ingredients, I can tweak the seasonings, make them gluten-free if needed, or even sneak in a little extra flavor with different breading twists. If you’re a snack lover like me—or just need something to impress the crew during movie night, game day, or a late-night cheese craving—you’re going to fall head over heels for this recipe.
Get ready, because we’re about to turn that simple block of mozzarella into a crispy, golden masterpiece that’s going to become your new snack-time superstar. Grab your air fryer, my friend—it’s mozzarella stick o’clock.
What’s on the Plate
Overview
- Cuisine: American with a crispy Italian twist
- Course: Appetizer / Snack
- Prep Time: 20 minutes (plus freeze time)
- Cook Time: 8 minutes
- Total Time: 30 minutes (active) + freeze
- Servings: 12 sticks
What’s in Every Bite
- Calories: 110
- Carbs: 8g
- Fats: 6g
- Protein: 6g
- Fiber: 1g
- Sugar: 1g
- Sodium: 180mg
Total Recipe Cost
- Estimated Total Cost: $7.50
- Cost Per Serving: $0.62
- Main Cost Factors: mozzarella cheese sticks, panko breadcrumbs
The Story Behind the Flavor
Mozzarella sticks first made their way into American food culture in the late 1970s and took off during the booming appetizer craze of the ’80s. Inspired by Italian fried cheeses and paired with marinara sauce, these cheesy delights became a staple at diners, sports bars, and chain restaurants. Traditionally, they’re deep fried, but with the invention of the air fryer, we’ve unlocked a lighter, equally crunchy way to enjoy them at home. Today, air fryer mozzarella sticks are the ultimate crowd-pleaser—easy to prep, customizable, and just as melty as the originals.
Perfect For
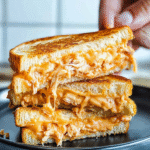
This creamy avocado grilled cheese isn’t just a sandwich—it’s a whole mood, and it fits right into so many moments of everyday life:
- After-School Snacks: When the kids come running in, backpacks flying, and those hungry eyes say, “Mom, feed me now!”—this sandwich saves the day. Quick, filling, and something they’ll actually want to eat.
- Game Day Munchies: Forget the complicated spreads. Stack up a tray of these melty sandwiches, cut them into halves or quarters, and watch them disappear faster than your team scores a touchdown.
- Family Movie Nights: Popcorn is fun, but when everyone’s curled up on the couch in pajamas, nothing beats passing around gooey grilled cheese wedges. Comfort food at its finest.
- Party Platters: Fancy appetizers are great, but a plate of mini grilled cheese bites? That’s the snack table hero. Easy to grab, impossible to resist.
- When the Cheese Craving Hits Hard: We’ve all been there—it’s late, you’re tired, and only something warm, cheesy, and satisfying will do. This recipe is your answer. No fuss, just pure happiness on a plate.
Why You’ll Love This Recipe
This air fryer mozzarella stick twist with avocado isn’t just good—it’s the kind of snack that makes you do a little happy dance in the kitchen. Here’s why you’ll fall head over heels for it:
- Super crispy on the outside, perfectly gooey on the inside: That crunch-to-stretch ratio is spot on. Bite in and you’ll get the golden crunch first, then that glorious cheese pull you’ll want to show off on Instagram.
- Healthier than deep-fried mozzarella sticks: We skip the oil bath and let the air fryer do all the work. Less grease, less guilt, but every bit as satisfying.
- Freezer-friendly for make-ahead snacking: Prep a batch, stash them in the freezer, and future-you will thank present-you when snack cravings hit.
- Quick to air fry in under 10 minutes: From basket to plate in minutes, these are perfect for those “I need something delicious, like, right now” moments.
- Guaranteed family (and friend) favorite: You know that snack that disappears before you even sit down? Yep, this is it. Make extras or prepare for some friendly kitchen “taste-testing thefts.”
Ingredients You’ll Need
Core Ingredients
- 12 mozzarella cheese sticks (string cheese)
- 2 large eggs, beaten
- 1 cup panko breadcrumbs
- ½ cup Italian-style breadcrumbs
- ½ cup all-purpose flour
- 1 teaspoon garlic powder
- 1 teaspoon onion powder
- 1 teaspoon Italian seasoning
- ½ teaspoon paprika
- Cooking spray
Optional Add-ins
- Crushed red pepper flakes (for a kick)
- Freshly grated Parmesan cheese in the breadcrumb mix
- Ranch or chipotle dipping sauce (alongside marinara)
Ingredient Highlights
- Mozzarella sticks – The star of the show, giving us that glorious cheese pull.
- Panko + Italian breadcrumbs – Double-breading magic that makes the crunch irresistible.
- Seasonings – Garlic, onion, Italian herbs, and paprika give the coating real depth.
- Eggs + flour – The glue that holds it all together, sealing in the cheese.
Step-by-Step Instructions
- Prep the cheese – Unwrap your mozzarella sticks and cut them in half if you prefer smaller pieces. Freeze for at least 1 hour so they don’t melt out while cooking.
- Set up dredging station – Place flour in one bowl, beaten eggs in another, and breadcrumbs mixed with seasonings in a third.
- Coat the sticks – Roll each frozen cheese stick in flour, dip in egg, coat in breadcrumbs, dip back in egg, and finish with another breadcrumb coating. Double coating = maximum crunch.
- Freeze again – Place breaded sticks on a parchment-lined tray and freeze for at least 30 minutes (or overnight). This step keeps the cheese from leaking.
- Air fry – Preheat air fryer to 390°F. Spray basket lightly with cooking spray. Arrange mozzarella sticks in a single layer and spray tops lightly. Cook 6–8 minutes, flipping halfway, until golden and crispy.
- Serve – Plate with marinara sauce (or your favorite dip) and enjoy immediately!
Pro Tips
I’ve made more mozzarella sticks than I care to admit (and eaten even more—no regrets!), so let me save you from the rookie mistakes and share the tricks that guarantee snack-time victory:
- Always freeze after breading: This is non-negotiable. If you skip it, you’ll be left with melted cheese puddles instead of those picture-perfect sticks. A quick 30 minutes in the freezer locks everything in place so the cheese stays inside where it belongs.
- Mix up your crumbs for crunch: I love using half panko, half Italian-style breadcrumbs. The panko gives you that big, airy crunch while the Italian crumbs bring in those herby, garlicky vibes—just like restaurant-style mozzarella sticks.
- Don’t overcrowd the air fryer basket: I know it’s tempting to pile them in, but trust me, they need space to crisp up. Work in batches and let the hot air circulate—patience pays off here.
- Parmesan = secret weapon: Toss some finely grated Parmesan right into your breadcrumb mix. It adds a nutty, salty depth that makes these taste like you ordered them from a fancy appetizer menu.
- Serve immediately—mozzarella waits for no one! These sticks are at their prime the second they come out of the fryer. Gooey, stretchy, crispy perfection. If you want to be the family hero, just call everyone over before you pull them out.
Recipe Variations
One of my favorite things about homemade mozzarella sticks is that they’re a total blank canvas. Once you’ve got the basic breading-and-freeze method down, you can spin them in so many directions depending on your mood (or whatever’s hiding in your fridge). Here are some of my go-to twists:
- Spicy Kick: If you like a little fire with your cheese pull, mix cayenne pepper, smoked paprika, or red chili flakes into your breadcrumb blend. You’ll get that crispy crunch followed by a lingering heat—perfect for game day or when you want your snacks to have a little sass.
- Cheese Swap: Mozzarella is classic, but why stop there? Try pepper jack for a zesty kick, cheddar for a sharp bite, or Colby-Jack for a mild, creamy twist. Each cheese brings its own personality, and you might just discover a new favorite.
- Gluten-Free Magic: Swap in gluten-free flour and gluten-free breadcrumbs, and these sticks turn into a party snack everyone can enjoy. The trick is making sure your crumbs are still coarse and crunchy—you want that satisfying bite!
- Herb Boost: Fresh herbs take these to garden-fresh heights. Chop parsley, basil, or even a little oregano into your breadcrumb coating. Not only does it look gorgeous with those flecks of green, but it also adds a burst of flavor that feels straight out of a trattoria.
- Extra Cheesy Coating: If you really want to double down on cheese (because why not?), add shredded Parmesan or Asiago to your breadcrumb mix. It melts into the crust and gives you an irresistible golden edge.
- Fun Shapes: Don’t limit yourself to sticks! Cut mozzarella into cubes for “cheese nuggets” (great for kids), or use string cheese halves for mini bites. They cook even faster and are dangerously poppable.
Gluten-Free Version
Just because you’re skipping gluten doesn’t mean you have to miss out on the magic of a gooey mozzarella stick. With a couple of easy swaps, these air fryer beauties turn out just as golden, crispy, and irresistible as the original.
Instead of all-purpose flour, grab a gluten-free flour blend—it coats the cheese sticks beautifully and still helps the egg wash cling. For the breadcrumbs, you’ve got options: go with store-bought gluten-free panko for that classic crunch, or pulse up gluten-free crackers or cornflakes in your food processor for a homemade coating that’s just as satisfying.
Everything else in the recipe stays the same—bread, freeze, air fry, and prepare to watch the cheese pulls disappear faster than you can plate them. Bonus tip: gluten-free breadcrumbs sometimes brown quicker than regular ones, so keep a close eye in the air fryer to avoid over-toasting.
Your gluten-free friends (and honestly, everyone else at the table) will be thrilled to have a cheesy snack they can enjoy without worry.
Kid-Friendly Version
When it comes to little snackers, simple usually wins the game. For a kid-approved batch, keep the seasonings mild—skip the cayenne, chili flakes, or anything too adventurous. A basic breadcrumb mix with just a touch of salt and maybe a sprinkle of Parmesan is plenty to make those golden, crunchy shells they’ll love.
And don’t forget the dipping sauces! Kids love choices, so set out a little snack station with warm marinara on one side and cool, creamy ranch on the other. Some even like to double-dip between the two—hey, no judgment here.
The best part? These mozzarella sticks are air-fried, which means you can serve them up on a weeknight without feeling like you just deep-fried dinner. Quick, crispy, cheesy, and guaranteed to earn you “Best Snack Mom” status. Serve them after school, at sleepovers, or during family movie night—and watch those little hands grab for seconds (and thirds).
Air Fryer Mozzarella Sticks
Ingredients
Equipment
Method
- Unwrap your mozzarella sticks and cut them in half if you prefer smaller pieces. Freeze for at least 1 hour so they don’t melt out while cooking.
- Place flour in one bowl, beaten eggs in another, and breadcrumbs mixed with seasonings in a third.
- Roll each frozen cheese stick in flour, dip in egg, coat in breadcrumbs, dip back in egg, and finish with another breadcrumb coating. Double coating = maximum crunch.
- Place breaded sticks on a parchment-lined tray and freeze for at least 30 minutes (or overnight). This step keeps the cheese from leaking.
- Preheat air fryer to 390°F. Spray basket lightly with cooking spray. Arrange mozzarella sticks in a single layer and spray tops lightly. Cook 6–8 minutes, flipping halfway, until golden and crispy.
- Plate with marinara sauce (or your favorite dip) and enjoy immediately!
Notes
Air Fryer Mozzarella Sticks – Helpful Tips
Cooking Tips & Techniques- Freeze the cheese sticks for at least 1–2 hours before breading and air frying — this keeps the cheese from oozing out too quickly.
- Use a double coating of flour–egg–breadcrumbs for an extra crispy crust that holds up in the air fryer.
- Spray the breaded sticks lightly with cooking spray before air frying to achieve a golden, crunchy texture.
- Preheat your air fryer to ensure even cooking and consistent crispiness.
- Cook in small batches to avoid overcrowding, which can cause uneven browning.
- Serve hot with warm marinara sauce for dipping — a classic combo.
- Pair with ranch, garlic aioli, or spicy sriracha mayo for variety.
- Create a party platter with mozzarella sticks, chicken wings, and potato skins.
- Sprinkle fresh parsley or grated Parmesan on top for extra flair before serving.
- Make-Ahead: Bread the mozzarella sticks and freeze them until ready to cook — they can be stored for up to 2 months.
- Refrigerator: Store cooked sticks in an airtight container for up to 2 days.
- Freezer: Re-freeze cooked sticks for up to 1 month, though texture is best when fresh.
- Reheat: Pop them back into the air fryer at 350°F for 3–4 minutes to restore crispiness — avoid microwaving, which makes them soggy.
- Spicy Kick: Add cayenne pepper, chili flakes, or hot sauce to the breadcrumb coating.
- Herb & Garlic Crust: Mix Italian seasoning, garlic powder, or dried basil into the breadcrumbs.
- Cheesy Upgrade: Use flavored mozzarella sticks (like jalapeño jack or cheddar cheese sticks) for a fun twist.
- Gluten-Free Option: Use gluten-free breadcrumbs and flour for a celiac-friendly snack.
- Panko Crunch: Swap regular breadcrumbs for panko to make them even crispier.
Taste What’s Next
Baked Garlic Parmesan Potato Wedges
Cranberry Brie Bites
Meaty Texas Trash Dip
Or you Can Dig Deeper Recipes by clicking this: Appetizer, Breakfast, Lunch, Dinner, and Desserts.
Storage & Reheating
Let’s be honest—leftover mozzarella sticks don’t happen often in my house. But on the rare occasion we actually do have some left (usually because I hid a few for later!), here’s how to keep them tasting just as good as fresh.
- Refrigerator: Once cooked, stash any extras in an airtight container in the fridge for up to 3 days. They’ll firm up a bit as they sit, but don’t worry—we’ll bring back that crunch when it’s time to reheat.
- Freezer: My favorite trick is freezing them before cooking. Just lay the breaded sticks on a baking sheet, freeze until solid, then transfer them to a freezer-safe bag or container. They’ll keep beautifully for up to 2 months, and you can cook them straight from frozen—no thawing needed! Perfect for when those snack cravings strike out of nowhere.
- Reheating: Forget the microwave (unless you enjoy sad, soggy cheese). Instead, pop them in your air fryer at 350°F for 3–4 minutes until the coating is crispy again and the cheese is melty. If you’re reheating a bigger batch, the oven at 375°F for 8–10 minutes works too. Either way, you’ll have gooey, golden perfection ready to dunk in your favorite sauce all over again.
Equipment
Good mozzarella sticks don’t require a fancy kitchen setup—just a few trusty tools you probably already have lying around. Here’s what I grab before I even start breading:
- Air Fryer – The star of the show! This little machine gives you that golden, crunchy exterior without deep frying. Any model works—just make sure you don’t overcrowd the basket.
- Mixing Bowls – You’ll need at least three: one for flour, one for eggs, and one for breadcrumbs. Think of it as your breading assembly line.
- Baking Sheet + Parchment Paper – Essential for freezing your mozzarella sticks before cooking. The parchment keeps them from sticking, and the sheet makes it easy to pop the whole tray into the freezer.
- Tongs – Your best friend for dunking and flipping without turning your hands into a sticky, cheesy mess.
- Measuring Cups & Spoons – To keep your seasoning mix on point. Sure, I eyeball sometimes, but a little accuracy goes a long way in making sure every stick is consistently delicious.
With these basics, you’ll breeze right through prep—and more importantly, you’ll be set up for melty, golden cheese stick success.
FAQs
How do you keep cheese from leaking out of air fryer mozzarella sticks?
Freeze the breaded sticks before cooking—this keeps the cheese locked inside.
Can I make mozzarella sticks ahead of time?
Yes! Bread them, freeze them, and store in a freezer bag until you’re ready to air fry.
What’s the best dipping sauce for mozzarella sticks?
Classic marinara is always a win, but ranch, garlic aioli, or spicy chipotle mayo are fantastic too.
Do you need to preheat the air fryer?
Yes, preheating ensures the sticks cook evenly and get that golden crunch.
Can I use regular cheese blocks instead of string cheese?
Absolutely—just cut them into stick shapes and freeze before breading.
Are air fryer mozzarella sticks healthier than deep-fried?
Definitely. They use less oil but still pack the same crunch and cheesy goodness.
External Resources
- Air Fryer Safety Tips – FDA
- The History of Mozzarella Cheese
- Nutritional Benefits of Cheese – Healthline
Conclusion
There’s something magical about pulling apart a mozzarella stick and watching that stretchy cheese bridge hold on for dear life before snapping. Making Air Fryer Mozzarella Sticks at home is not only easy but also downright fun—you’re basically serving joy in crunchy little packages. And once you master this recipe, you’ll never need to rely on store-bought frozen ones again. From game days to family nights, this recipe has you covered.
So go ahead—grab that marinara, call the kids, and let’s make snack time unforgettable. Snap a photo and post it online! Don’t forget to tag me—I want to see your cheesy triumphs. Happy cooking!