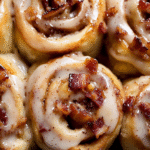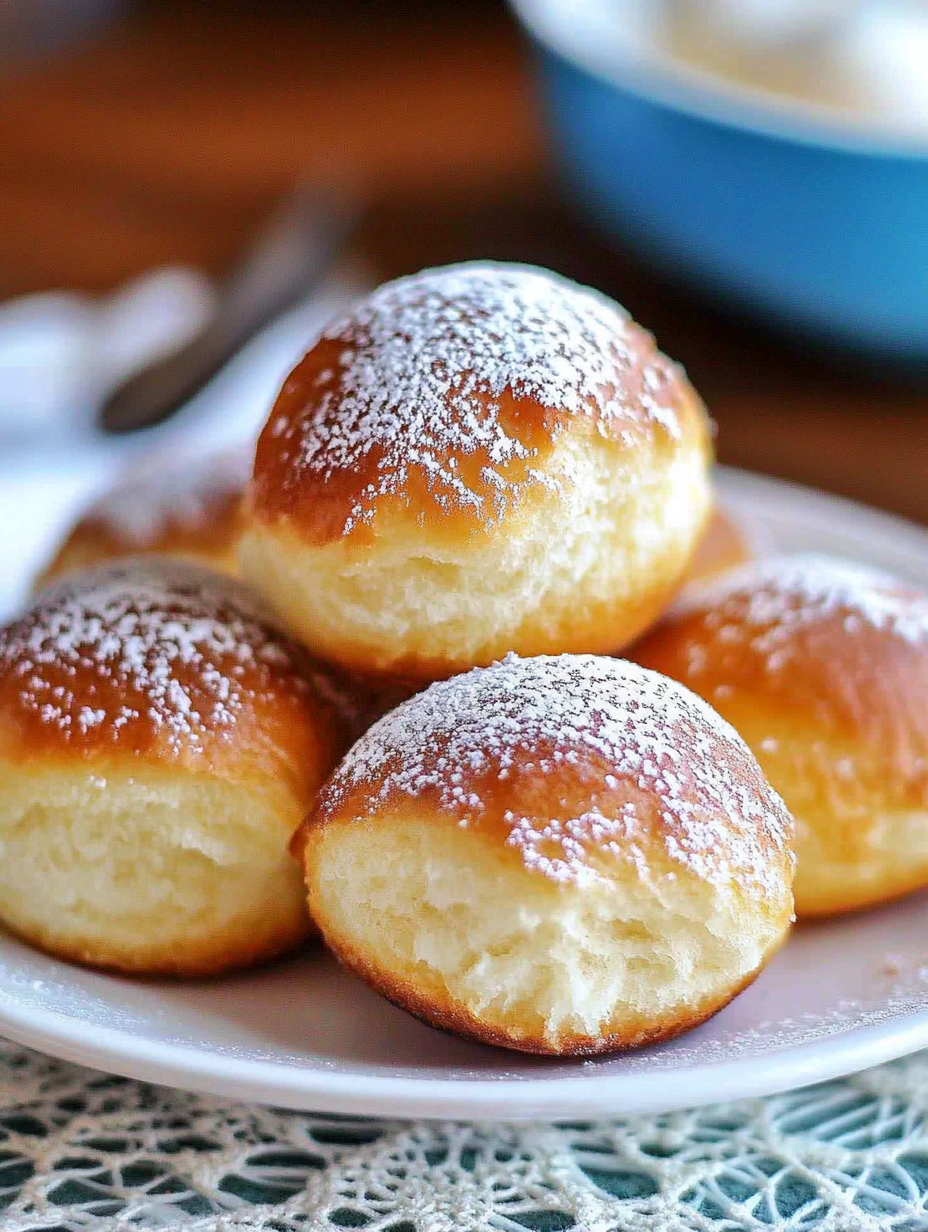
There’s something magical about waking up to the sweet, buttery aroma of cinnamon sugar filling the kitchen. French Breakfast Puffs are my little morning indulgence—light, tender, and perfectly rolled in a glorious cinnamon-sugar coat that makes them taste like a warm hug in pastry form. I love making these for special mornings, but they’re so easy, I often whip them up just because. There’s a nostalgic charm to them that reminds me of old-fashioned bake sales, cozy weekend brunches, and those moments when you want to spoil your family a little.
From the very first bite, you’ll notice the delicate crumb of the muffin-like base, the buttery richness that coats your lips, and that irresistible crunch of cinnamon sugar that practically dances on your taste buds. Whether you pair them with coffee, tea, or a cold glass of milk, these puffs make mornings brighter, busier days softer, and weekends a bit more decadent. And yes—they disappear faster than I can bake them.
What’s on the Plate
Overview
- Cuisine: American
- Course: Breakfast, Brunch, Snack
- Prep Time: 15 minutes
- Cook Time: 20 minutes
- Total Time: 35 minutes
- Servings: 12 puffs
What’s in Every Bite
- Calories: 210
- Carbs: 28g
- Fats: 10g
- Protein: 3g
- Fiber: 1g
- Sugar: 15g
- Sodium: 160mg
Total Recipe Cost
- Estimated Total Cost: $5.20
- Cost Per Serving: $0.43
- Main Cost Factors: Butter, eggs, cinnamon
The Story Behind the Flavor
First created in the mid-20th century in American home kitchens, French Breakfast Puffs are less “French” and more “homestyle comfort.” Their name likely came from the elegant-sounding flair that made them feel a little fancier than your everyday muffin. Traditionally, they’re baked like muffins, then dipped in melted butter and rolled in cinnamon sugar for that perfect balance of soft and sweet. Over the decades, they’ve found their way into church potlucks, school events, and countless family recipe boxes.
Perfect For
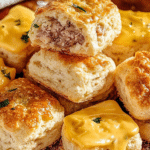
This Crescent Roll Breakfast Casserole isn’t just breakfast—it’s the kind of dish that makes people slow down, smile, and ask for seconds. It’s my go-to when I want something hearty, comforting, and just a little bit indulgent without keeping me stuck in the kitchen all morning.
- Weekend brunches: Ideal for lazy Saturdays or bustling Sunday brunch spreads. You can prep it the night before, then just pop it in the oven while you make coffee. Your guests will think you worked all morning, but you’ll know the secret.
- Holiday breakfasts: Christmas morning, Easter brunch, New Year’s Day—this casserole works for them all. It’s filling, festive, and keeps everyone full enough to make it from gift opening to dinner without endless snacking.
- Mother’s Day surprises: Serve it with a vase of flowers, a side of fresh fruit, and her favorite coffee, and you’ve basically guaranteed yourself the title of “favorite child” (at least for the day).
- Cozy mornings at home: Think rainy-day comfort or the first chilly morning of fall. This casserole comes out of the oven golden and bubbling, filling the whole house with the smell of buttery pastry and melted cheese. It’s basically a hug on a plate.
- Bake sale crowd-pleasers: Most bake sales are a sugar overload—bring this savory beauty and watch it vanish. Cut it into neat squares, wrap in parchment, and you’ve got a warm, cheesy surprise among all the cupcakes and cookies.
- Potluck brunches: Easy to transport and simple to reheat, this casserole is the hero dish you’ll be asked to bring again and again. It holds up well on a buffet table and tastes just as good at room temperature.
Why You’ll Love This Recipe
- Quick and easy — From mixing bowl to warm, cinnamon-scented bliss in just 35 minutes. You don’t even have to wait for dough to rise or mess with complicated steps — it’s pure instant gratification.
- Uses pantry staples — Everything you need is likely already in your kitchen. Flour, sugar, butter, cinnamon… they’re all just sitting there, waiting to be turned into something magical. No frantic grocery trips, no exotic ingredients — just good, old-fashioned baking comfort.
- Buttery, cinnamon-sugar coating — This isn’t just a topping; it’s the soul of the recipe. The butter seeps into every crack and crevice while the cinnamon-sugar mix wraps around it like a cozy sweater for your taste buds. One bite and you’ll understand why people can’t stop coming back for seconds.
- Perfect balance of soft and sweet — The inside is tender and fluffy, the outside is kissed with just enough sweetness to make it feel indulgent without being heavy. It’s the kind of treat you can enjoy with morning coffee or as an afternoon pick-me-up.
- Make-ahead friendly — Whether you’re hosting brunch, preparing for a busy school morning, or adding a touch of homemade charm to a holiday breakfast, you can prep these ahead and simply reheat. They’ll still taste fresh-from-the-oven and make you look like a kitchen hero with zero stress.
Ingredients You’ll Need
Core Ingredients
- All-purpose flour
- Baking powder
- Salt
- Ground nutmeg
- Sugar
- Unsalted butter
- Eggs
- Whole milk
Optional Add-ins
- Vanilla extract for a warm, sweet note
- Cardamom for extra spice depth
- Lemon zest for brightness
Ingredient Highlights
- Butter: Gives richness and helps the cinnamon-sugar stick.
- Nutmeg: Adds a subtle warmth that pairs beautifully with cinnamon.
- Milk: Creates a moist, tender crumb.
Step-by-Step Instructions
- Preheat oven to 350°F (175°C). Grease a 12-cup muffin tin.
- Mix dry ingredients—flour, baking powder, salt, and nutmeg.
- Cream butter and sugar until light and fluffy.
- Beat in eggs one at a time.
- Alternate adding dry mixture and milk until just combined.
- Spoon batter evenly into muffin cups.
- Bake for 20 minutes or until golden.
- Melt butter in a small bowl; combine cinnamon and sugar in another.
- Dip warm puffs in butter, then roll in cinnamon sugar.
Pro Tips
- Go gentle on the mixing — When you combine the wet and dry ingredients, stir just until everything is incorporated. Overmixing develops the gluten too much, which can make your puffs dense instead of delightfully light and airy. Think “lazy folds,” not “intense arm workout.” Your batter should look a little lumpy—that’s your ticket to fluff-town.
- Coat while they’re cozy and warm — Cinnamon sugar sticks like a dream when the puffs are fresh out of the oven and still radiating that bakery warmth. Work quickly so the butter melts in and the sugar forms that magical crust. If you wait too long, the coating will slip right off like a shy dance partner at prom.
- Brush, don’t dunk (optional) — If you want a lighter touch of butter, grab a pastry brush instead of dunking the whole puff. This way, you control how much butter goes on—perfect if you’re aiming for a crisp sugar shell without too much richness. It’s also a bit neater for kids to help with.
- Sugar upgrade — For a deeper, almost caramel-like flavor, try swapping some of the white sugar with light brown sugar. The subtle molasses notes take the cinnamon coating to a whole new level, almost like a churro crossed paths with a bakery puff.
- Bake and taste test — Pull one puff out a minute early, break it open, and check the texture. If it’s light, fluffy, and steaming, you’ve nailed it. If it’s still gummy in the center, give it another minute or two. A quick “chef’s sample” not only ensures perfect doneness but also gives you first dibs—perks of being the cook!
- Rotate for even baking — Halfway through the bake time, spin your muffin tin around. Home ovens often have hot spots, and this quick trick keeps your puffs evenly golden instead of having a few overachievers hogging all the color.
- Double dip for extra decadence — Want a thicker, sweeter crust? Butter and sugar them once, let them sit for a minute, then repeat. Yes, it’s indulgent… but you’re here for flavor, not restraint.
Recipe Variations
- Mini Puffs – Want these to be dangerously poppable? Grab a mini muffin tin and make bite-sized versions. They bake in just 10–12 minutes, which means less waiting and more snacking. Perfect for little hands at kids’ parties, an after-school treat, or those “just one more” moments that mysteriously end up at five (or ten). Serve them in a big bowl and watch them disappear faster than you can say “save me one!”
- Filled Puffs – Go full-on surprise mode by tucking a small spoonful of jam, lemon curd, or Nutella into the center of each puff before baking. The golden, fluffy outside hides a molten treasure inside—whether it’s tangy, fruity, or rich and chocolatey. Serve warm so the filling stays gooey, and don’t be surprised if people ask which bakery you went to. (You can wink and keep your secret.)
- Savory Version – In the mood for brunch instead of dessert? Skip the cinnamon sugar entirely. Brush the puffs with melted butter, then roll them in freshly grated Parmesan, a sprinkle of garlic powder, and a dash of dried herbs like parsley, thyme, or rosemary. These are fantastic alongside a steaming bowl of soup, a breakfast omelet, or even as a cheesy appetizer for game day. Bonus: your kitchen will smell like an Italian bakery.
- Apple Pie Puffs – Dice up some crisp apples (Honeycrisp or Granny Smith work great), toss them in cinnamon and sugar, and fold them gently into the batter before baking. The apples soften just enough to release their sweet-tart juices, giving you all the cozy, nostalgic vibes of apple pie—but in a handheld, fluffy form. Drizzle with caramel sauce for the ultimate autumn comfort treat.
- Pumpkin Spice Puffs – Swap the cinnamon sugar coating for pumpkin spice, and whisk a tablespoon of pumpkin purée right into the batter. As they bake, your kitchen will smell like a fall festival. Pair these with a pumpkin latte, light a candle, and you’ve basically created a coffee shop experience without ever leaving your pajamas.
Gluten-Free Version
Going gluten-free? No problem—these puffs can still be soft, fluffy, and totally irresistible! Simply swap the all-purpose flour with your favorite gluten-free baking blend that already contains xanthan gum for structure. If your mix doesn’t have it, add ½ teaspoon per cup of flour to help mimic that classic puff texture. Because gluten-free flours tend to brown faster, keep a close eye on them and reduce the baking time by about 2–3 minutes. You’ll know they’re ready when they’re lightly golden and spring back when gently pressed. The result? Sweet little bites of cinnamon-sugar magic that no one will guess are gluten-free!
Kid-Friendly Version
Turn these puffs into a hands-on kitchen adventure! Make them in mini form using a mini muffin tin—perfect for little hands and smaller appetites. Once they’ve cooled just enough to handle, set up a “cinnamon sugar station” and let the kids do the rolling. Yes, it will get messy, but that’s half the fun! Give each child their own small bowl of cinnamon sugar, and watch their eyes light up as they coat the warm, buttery puffs. Bonus tip: pop on some aprons and call it a “baking party”—instant memories and plenty of giggles.
French Breakfast Puffs
Ingredients
Equipment
Method
- Preheat oven to 350°F (175°C). Grease a 12-cup muffin tin.
- Mix dry ingredients—flour, baking powder, salt, and nutmeg.
- Cream butter and sugar until light and fluffy.
- Beat in eggs one at a time.
- Alternate adding dry mixture and milk until just combined.
- Spoon batter evenly into muffin cups.
- Bake for 20 minutes or until golden.
- Melt butter in a small bowl; combine cinnamon and sugar in another.
- Dip warm puffs in butter, then roll in cinnamon sugar.
Notes
Helpful Tips for French Breakfast Puffs
- Use softened butter, not melted – This keeps the batter light and fluffy, giving the puffs that tender crumb you’re after.
- Don’t overmix the batter – Stir just until combined so the puffs stay airy instead of dense.
- Fill muffin cups only 2/3 full – This allows room for the puffs to rise without spilling over.
- Coat while still warm – Roll the puffs in the cinnamon-sugar mixture as soon as they’re cool enough to handle so it sticks perfectly.
- Double-dip for extra flavor – Brush with melted butter and coat in cinnamon-sugar twice for a richer, bakery-style finish.
- Serve fresh – These are at their peak warm from the oven, but you can reheat in a 300°F (150°C) oven for 5–7 minutes if making ahead.
Taste What’s Next
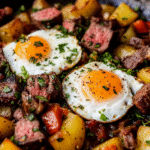
Hawaiian Roll Breakfast Sliders with Sausage Egg & Cheese
Mexican Street Corn Chicken Tacos
Pizza Burgers
or you Can Dig Deeper Recipes by clicking this: Appetizer, Breakfast, Lunch, Dinner, and Desserts.
Storage & Reheating
- Room Temperature – These French Breakfast Puffs are at their peak on day one, but if you somehow resist eating them all, store them in an airtight container at room temp for up to 3 days. To keep them from getting soggy, line the container with a paper towel to absorb any extra moisture.
- Freezer – Want to enjoy fresh-baked puffs any day? Wrap each puff individually in plastic wrap, then tuck them into a freezer-safe bag or container. They’ll keep beautifully for up to 1 month. When you’re ready for a treat, just grab one, no thawing required before reheating.
- Reheating – To bring back that just-baked magic, you have two great options:
- Microwave – Pop one puff on a microwave-safe plate and warm for 10–15 seconds. This softens the crumb and refreshes the cinnamon aroma.
- Oven – Preheat to 300°F (150°C), place puffs on a baking sheet, and warm for about 5 minutes. This method is perfect if you want that light exterior crispness back.
- Extra Tip – If reheating from frozen, add an extra 2–3 minutes to oven time, or 5–10 seconds to microwave time, so they’re heated through without drying out.
Equipment
- Muffin tin
- Mixing bowls
- Electric mixer
- Pastry brush
FAQs
Q: Why are they called French Breakfast Puffs?
A: The name is more about elegance than origin—they’re actually an American creation.
Q: Can I make these ahead of time?
A: Yes! Bake, cool, then store in an airtight container. Coat with butter and cinnamon sugar before serving.
Q: Can I use margarine instead of butter?
A: Butter gives the best flavor, but margarine works in a pinch.
Q: How do I make them fluffier?
A: Avoid overmixing and make sure your baking powder is fresh.
Long-tail Keywords: old-fashioned cinnamon sugar breakfast muffins, buttery French breakfast puffs recipe, easy weekend brunch pastry, nostalgic breakfast muffin recipe, homemade cinnamon sugar coated muffins
External Resources
Conclusion
French Breakfast Puffs are my little secret to turning an ordinary morning into something special. The way the butter soaks into that tender crumb and the cinnamon sugar crunches with every bite—it’s pure breakfast bliss. I’ve lost count of how many times these have brought smiles around my table. So go ahead — snap a photo and post it online! Don’t forget to tag me! I want to see your cooking success. Happy cooking!