Introduction
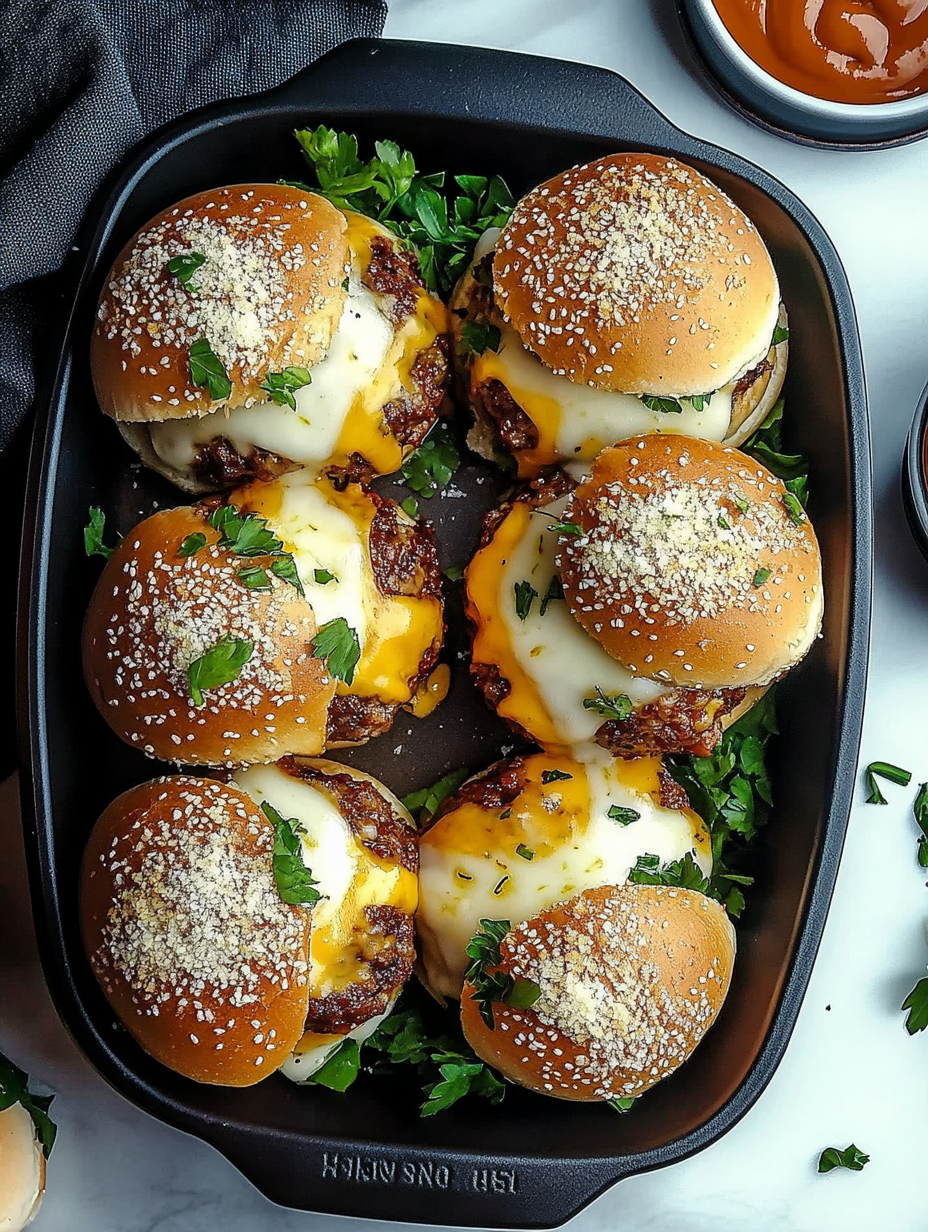
When I want to make something bold, cheesy, and undeniably comforting, I whip up a batch of these Garlic Parmesan Cheeseburger Bombs. Just imagine buttery golden dough wrapped around a juicy cheeseburger filling—seasoned beef, gooey cheddar, a touch of ketchup and mustard—then brushed with garlic butter and sprinkled generously with parmesan cheese before being baked until perfectly golden. These are the kind of savory, handheld bites that steal the show whether it’s game day, a potluck, or just Tuesday night dinner.
I created Garlic Parmesan Cheeseburger Bombs after trying to make a fun, bite-sized alternative to classic burgers for a tailgate party. The idea was simple: everything people love about cheeseburgers, but wrapped up in a fluffy dough bomb and packed with even more flavor. What started as an experiment quickly turned into a crowd favorite—crispy on the outside, cheesy and beefy on the inside, with the kind of garlic-parmesan crust that keeps you reaching for more.
These Garlic Parmesan Cheeseburger Bombs aren’t just delicious—they’re wildly versatile. Serve them as a party appetizer, pack them in lunchboxes, or make a double batch and freeze them for quick dinners. They hit that perfect sweet spot of comfort food meets handheld snack. Let’s fire up that oven and make a batch—you’re going to love this one.
Perfect For:
- Game day or tailgate party appetizers
- Kid-friendly family dinners
- Meal prep or freezer-friendly snacks
- Holiday party finger food
- Cheeseburger lovers who want a fun twist
Why You’ll Love This Recipe:
- Handheld Perfection: All the juicy, cheesy flavor of a cheeseburger wrapped in a buttery biscuit shell.
- Garlic Parmesan Crust: Buttery garlic and nutty parmesan make each bite extra savory.
- Freezer-Friendly: Make a big batch and freeze for fast lunches or dinners.
- Crowd-Pleaser: Great for feeding a group—these disappear fast!
- Customizable: Swap in your favorite burger toppings or go spicy with jalapeños and pepper jack.
Prep & Cook Time:
- Prep Time: 25 minutes
- Cook Time: 15–18 minutes
- Total Time: ~40 minutes
- Servings: 8–10 cheeseburger bombs
- Calories: ~290 per serving
Ingredients:
- 1 lb ground beef
- 1/2 tsp garlic powder
- 1/2 tsp onion powder
- Salt and pepper to taste
- 1 tbsp ketchup
- 1 tbsp yellow mustard
- 1/2 cup shredded cheddar cheese
- 1 (16.3 oz) can refrigerated biscuit dough (8 biscuits)
For the Garlic Parmesan Topping:
- 3 tbsp melted butter
- 2 cloves garlic, minced
- 1/4 cup grated parmesan cheese
- 1 tbsp chopped parsley (optional)
Ingredient Highlights:
- Ground Beef: The heart of the cheeseburger flavor—seasoned and juicy.
- Cheddar Cheese: Melty and rich, classic for burgers.
- Refrigerated Biscuits: Soft, fluffy, and perfect for encasing the filling.
- Garlic Butter: Adds irresistible flavor and moisture.
- Parmesan Cheese: Toasty and salty when baked—creates that golden, crispy top.
Step-by-Step Instructions:
- Preheat the oven to 375°F. Line a baking sheet with parchment paper.
- Brown the beef: In a skillet over medium heat, cook ground beef until no longer pink. Season with garlic powder, onion powder, salt, and pepper. Stir in ketchup and mustard. Let cool slightly, then mix in cheddar cheese.
- Prepare the dough: Flatten each biscuit into a 4–5 inch circle.
- Fill and seal: Place 2 tablespoons of the meat mixture in the center of each dough circle. Fold the dough around the filling and pinch to seal. Place seam-side down on the baking sheet.
- Add garlic butter: Mix melted butter with minced garlic. Brush over each dough ball.
- Top with parmesan: Sprinkle grated parmesan over the tops.
- Bake: Bake for 15–18 minutes or until golden brown.
- Serve warm: Garnish with parsley if desired. Serve with dipping sauces like ketchup, mustard, or burger sauce.
Serving Suggestions:
- Serve with dipping sauces: ketchup, mustard, ranch, or spicy mayo.
- Add a side of sweet potato fries or onion rings.
- Pair with a crunchy slaw or pickles.
- Serve as part of a game day spread.
- Toss a few into a lunchbox for a hearty, fun surprise.
Additional Tips:
- Let the filling cool slightly before stuffing—it helps prevent soggy dough.
- Don’t overfill the dough or it will burst during baking.
- Use shredded mozzarella or pepper jack for variation.
- Add chopped pickles, onions, or jalapeños to the beef mixture.
- Brushing with egg wash before baking gives a shinier finish.
Recipe Variations:
- Bacon Cheeseburger Bombs
- Take your flavor game up a notch by mixing chopped cooked bacon into the beef filling for a smoky, savory twist. The salty crunch of bacon pairs perfectly with melty cheddar and juicy beef — just like your favorite diner-style burger in bite-sized form!
- Spicy Kick
- Craving heat? Stir in finely chopped jalapeños, red pepper flakes, or even a splash of hot sauce into the meat mixture. Swap the standard cheese for pepper jack to layer in more bold, zesty flavor with every bite.
- Mushroom Swiss Bombs
- Go for a gourmet spin by replacing the cheddar with Swiss cheese and folding in sautéed mushrooms. This variation gives you an earthy, nutty profile that’s perfect for mushroom lovers. Add a pinch of garlic powder to deepen the savory notes.
- Vegetarian Option
- Skip the meat and use a plant-based ground beef alternative along with vegan cheese shreds for a fully vegetarian version. You can also sauté diced veggies like bell peppers, onions, and zucchini for a hearty, meat-free filling that doesn’t skimp on flavor.
- Pizza Bombs
- Turn your bombs into mini pizzas! Swap out the ground beef for chopped pepperoni or Italian sausage, use mozzarella cheese, and toss in a little Italian seasoning. Serve with warm marinara sauce for dipping — kids and adults alike will go crazy for these.
Storage & Freezing:
Refrigerator
Once your burger bombs have cooled, transfer any leftovers to an airtight container or wrap them tightly in foil to maintain their softness and flavor. They’ll stay fresh in the fridge for up to 4 days.
When you’re ready to reheat, you have a couple of options:
- Microwave: Heat one or two bombs on a microwave-safe plate for 30–45 seconds, or until the centers are warm.
- Oven: Preheat to 300°F and reheat the bombs for 8–10 minutes to bring back that slightly crisp exterior while keeping the inside juicy and melty.
Freezer
These burger bombs are freezer-friendly and great for prepping ahead! Let them cool completely first, then wrap each one individually in plastic wrap or foil to prevent freezer burn. Place the wrapped bombs in a large resealable freezer bag or airtight container.
They’ll hold up well in the freezer for up to 2 months. Label them with the date so you’ll know when it’s time to restock your stash!
Reheat
- Microwave (From Frozen): Unwrap and place a burger bomb on a microwave-safe plate. Heat on high for 1–2 minutes, checking halfway to avoid overheating. If needed, add a splash of water and cover loosely with a damp paper towel to prevent drying out.
- Oven (Best Texture): Preheat your oven to 325°F. Place the frozen burger bombs on a parchment-lined baking sheet and bake for 15–18 minutes, or until fully heated through and lightly golden. For a crisper bite, brush with a little melted butter during the last 5 minutes of reheating.
Equipment Needed:
- Skillet for browning beef
- Baking sheet
- Parchment paper
- Small bowl for garlic butter
- Pastry brush
- Spatula
FAQs (From People Also Ask):
What are cheeseburger bombs made of?
Cheeseburger bombs are made of seasoned ground beef, cheese, and classic burger condiments wrapped in biscuit dough, then baked until golden. They’re often topped with garlic butter and parmesan for extra flavor.
Can I use pizza dough instead of biscuits?
Yes, you can substitute biscuit dough with pizza dough. Just cut it into even squares or circles and follow the same process.
Are cheeseburger bombs freezer-friendly?
Absolutely. They freeze well and reheat quickly, making them great for meal prep or busy weeknights.
How do I keep the dough from getting soggy?
Let the filling cool before wrapping it, and don’t overfill. Baking at the correct temperature also ensures the crust stays crisp.
Can I air fry cheeseburger bombs?
Yes! Air fry at 350°F for 8–10 minutes, flipping halfway through. They come out golden and crisp.
What’s a good dipping sauce for cheeseburger bombs?
Try burger sauce, ranch dressing, mustard, spicy mayo, or even a side of marinara for a fusion twist.
External Links:
- Harvard Health – High-protein foods
- Cleveland Clinic – Why Cheddar Cheese is Good in Moderation
- Safe Minimum Cooking Temperatures
Garlic Parmesan Cheeseburger Bombs
Ingredients
Method
- Preheat the oven to 375°F. Line a baking sheet with parchment paper.
- Brown the beef: In a skillet over medium heat, cook ground beef until no longer pink. Season with garlic powder, onion powder, salt, and pepper. Stir in ketchup and mustard. Let cool slightly, then mix in cheddar cheese.
- Prepare the dough: Flatten each biscuit into a 4–5 inch circle.
- Fill and seal: Place 2 tablespoons of the meat mixture in the center of each dough circle. Fold the dough around the filling and pinch to seal. Place seam-side down on the baking sheet.
- Add garlic butter: Mix melted butter with minced garlic. Brush over each dough ball.
- Top with parmesan: Sprinkle grated parmesan over the tops.
- Bake: Bake for 15–18 minutes or until golden brown.
- Serve warm: Garnish with parsley if desired. Serve with dipping sauces like ketchup, mustard, or burger sauce.
Notes
Garlic Parmesan Cheeseburger Bombs – Helpful Tips
Cooking Tips & TechniquesUse refrigerated biscuit dough or homemade dough for a fluffy, golden crust that bakes up beautifully.
Cook the ground beef with diced onions, garlic, salt, and pepper until browned and flavorful—drain any excess grease to avoid sogginess.
Stir in shredded cheddar (or American cheese) while the beef is warm so it melts evenly into the filling.
When shaping, seal the dough tightly around the filling to prevent leaks during baking. Pinch the seams well and place seam-side down on the baking sheet.
Brush with garlic butter and sprinkle with grated parmesan before and after baking for that extra flavor-packed crust. Serving Suggestions
Serve hot from the oven with a side of ketchup, burger sauce, or spicy mayo for dipping.
Pair with fries, tater tots, or a fresh garden salad for a complete meal.
These make excellent game day snacks, party appetizers, or lunchbox hits.
Slice them in half and serve on a platter with pickles and dipping sauces for a fun appetizer tray.
Try adding a side of roasted vegetables or coleslaw for balance. Make-Ahead & Storage
Make-Ahead: Prepare the beef and cheese filling up to 2 days in advance and store in the fridge. You can also shape and refrigerate unbaked bombs overnight.
Refrigerator: Store baked bombs in an airtight container in the fridge for up to 4 days.
Freezer: Freeze unbaked bombs on a tray, then transfer to a bag for up to 2 months. Bake from frozen, adding a few extra minutes.
Reheat: Reheat in the oven at 325°F or in an air fryer until warmed through and the crust is crisp again. Tasty Variations to Try
Bacon Cheeseburger Bombs: Add crumbled cooked bacon to the beef mixture for a smoky, savory twist.
Spicy Jalapeño Bombs: Stir chopped jalapeños into the cheese filling or top with pepper jack.
Mushroom Swiss Version: Use sautéed mushrooms and Swiss cheese instead of cheddar for a gourmet-style bite.
BBQ Cheeseburger Bombs: Mix in a tablespoon of BBQ sauce with the beef and use smoked cheddar or gouda.
Low-Carb Option: Use fathead dough or a keto-friendly biscuit mix to keep it low in carbs.
Conclusion
Garlic Parmesan Cheeseburger Bombs are more than just a snack—they’re an experience. They hit all the right notes: crispy on the outside, juicy and cheesy on the inside, and finished with a buttery garlic-parmesan crust that’s impossible to resist. These are the kind of savory bites that bring people together, whether it’s at a party, a lunch table, or the family dinner spread.
I love how easy they are to make and how customizable they can be. You get the fun of finger food with the soul of comfort food, and they freeze beautifully for whenever you need a quick fix of something hearty and satisfying.
So let’s roll up our sleeves and get baking. And once you’ve made a batch, include me in your post—I want to see your cheesy, golden creations. These bombs are made to be shared, and I can’t wait to see how you make them your own!