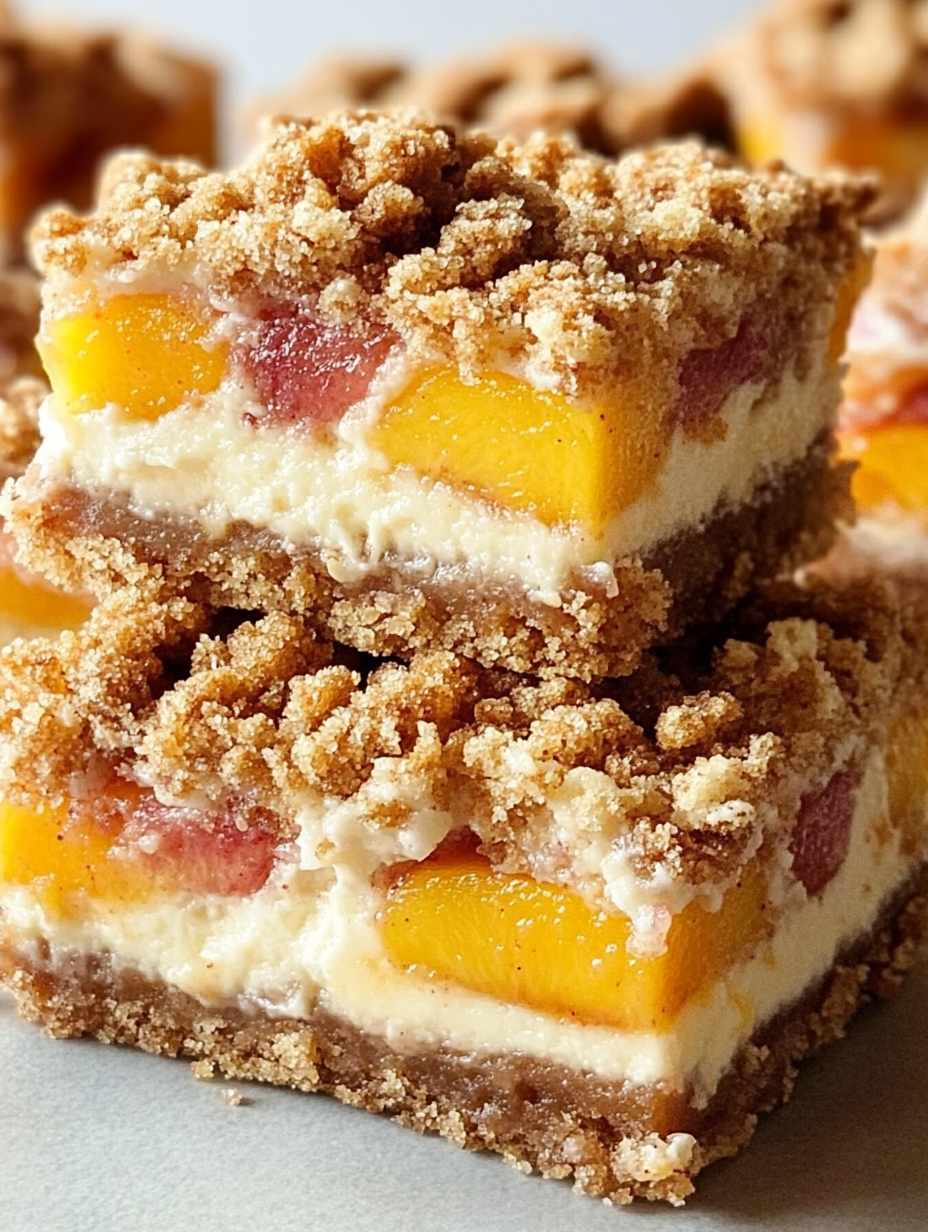
If there’s one dessert that can make me swoon every single time, it’s my Peach Cobbler Cheesecake Bars. Just picture it—sweet peaches baked to bubbly perfection, tucked into a buttery cobbler crust, and layered with a creamy cheesecake filling that melts in your mouth. These bars combine two of my all-time favorites—southern-style peach cobbler and silky cheesecake—into one dreamy, sliceable dessert. I’m telling you right now: this recipe is about to steal the show at your next family gathering, summer cookout, or honestly, even a random Tuesday night. Because let’s be real, who doesn’t deserve a little peachy indulgence midweek?
Whenever I make these Peach Cobbler Cheesecake Bars, the kitchen fills with the kind of aroma that makes the neighbors jealous. The warm scent of peaches, cinnamon, and vanilla blends with the rich, creamy cheesecake layer, and I can hardly wait for the bars to set before sneaking a bite. They’re the perfect balance of fruity, creamy, and crunchy, and they cut beautifully into squares that are just begging to be stacked on a dessert plate. Trust me—once you make them, they’ll become part of your dessert rotation year after year.
What’s on the Plate
Overview:
Cuisine: American (Southern-inspired)
Course: Dessert
Prep Time: 25 minutes
Cook Time: 45 minutes
Total Time: 1 hour 10 minutes (plus chilling)
Servings: 16 bars
What’s in Every Bite:
Calories: ~310
Carbs: 34g
Fats: 16g
Protein: 5g
Fiber: 2g
Sugar: 23g
Sodium: 190mg
Total Recipe Cost:
Estimated Total Cost: $14.25
Cost Per Serving: ~$0.89
Main Cost Factors: Fresh peaches, cream cheese, butter
The Story Behind the Flavor
Peach cobbler has been a southern staple since the 1800s, when settlers baked fruit desserts in deep Dutch ovens over open fires. Cheesecake, on the other hand, has roots going all the way back to ancient Greece. It wasn’t until American bakers in the 20th century started experimenting with cream cheese that cheesecake took on the velvety richness we know today. Combining cobbler and cheesecake into bars is a modern twist that’s all about convenience and portability—you get all the layers of comfort food in a handheld slice. For me, these Peach Cobbler Cheesecake Bars are a way to honor tradition while keeping dessert fun, approachable, and perfect for sharing.
Perfect For
This Brown Sugar Peach Cake isn’t just a dessert—it’s a mood setter, a table brightener, and the kind of treat that makes people stop mid-bite and go, “Who made this?!” Here’s where it really shines:
Weeknight treats that feel a little extra special: Because sometimes you just need a sweet pick-me-up after dinner, and this cake is simple enough to whip up without making a mess of the kitchen.
Summer picnics and BBQs: Nothing says summer quite like juicy peaches baked into a sweet, golden cake. Slice it up, pack it in a container, and it’ll be the first thing to vanish at the picnic table.
Holiday dessert spreads: Even when the snow is falling, this cake brings sunshine to the table. It’s a fun twist alongside pies and cookies, and the warm brown sugar notes make it perfectly festive.
Potlucks where you need a guaranteed crowd-pleaser: You know those dishes everyone hovers around until the last crumb disappears? Yep—that’s this cake.
Bake sales (these sell out fast!): Wrap individual squares in parchment or clear bags, and watch them fly off the table. Bonus: it makes your kitchen smell like a bakery.
Why You’ll Love This Recipe
This Brown Sugar Peach Cake is the kind of dessert that earns its own round of applause before you even slice it. Here’s why you’ll be coming back to this recipe again and again:
Showstopping presentation with minimal effort: It looks like something you’d spot in a bakery window, but the process is simple enough for a weeknight bake. A dusting of powdered sugar or a dollop of whipped cream, and you’ve got a dessert that looks as dreamy as it tastes.
Layers of texture: Every forkful has something to love—starting with the buttery crust that practically melts on your tongue, followed by a creamy cheesecake layer that feels downright indulgent, then juicy peaches bursting with sunshine flavor, and finally that irresistible brown sugar crumble topping. It’s like four desserts rolled into one.
Perfect balance of flavors: Sweet, tart, and creamy all dance together in harmony. The peaches bring a bright fruity tang, the cheesecake layer smooths everything out, and the brown sugar topping gives you that cozy, caramel-like sweetness.
Make-ahead magic: Hosting a party? Need something stress-free for tomorrow’s potluck? This cake chills beautifully and slices into neat, clean bars—no messy edges, no last-minute fuss.
Fresh or canned peaches both work: Whether you’ve got a basket of ripe farmers’ market peaches or just a can in your pantry, this recipe flexes to fit your kitchen. That means peach cake all year round.
Ingredients You’ll Need
Core Ingredients:
- 1 1/2 cups graham cracker crumbs
- 1/2 cup unsalted butter, melted
- 16 oz cream cheese, softened
- 3/4 cup granulated sugar
- 2 large eggs
- 1 teaspoon vanilla extract
- 3 cups fresh peaches (peeled, sliced, and lightly tossed with 1 tablespoon sugar)
- 1/2 teaspoon cinnamon
Optional Add-ins:
- Pinch of nutmeg for warmth
- Brown sugar instead of white for a deeper caramel flavor
- Almond extract for a nutty undertone
- Crushed pecans in the topping
Ingredient Highlights
Peaches: Fresh summer peaches are best, but canned or frozen work too.
Cream cheese: Gives that signature cheesecake tang and creaminess.
Graham cracker crust: The buttery foundation that holds it all together.
Cinnamon: Warms up the fruit and enhances natural sweetness.
Butter: Rich and comforting, especially in the crumble topping.
Step-by-Step Instructions
- Preheat oven to 350°F (175°C). Line a 9×13-inch baking pan with parchment paper.
- Mix graham cracker crumbs and melted butter. Press firmly into the bottom of the pan to form the crust. Bake for 8 minutes, then set aside.
- In a large bowl, beat cream cheese, sugar, eggs, and vanilla until smooth. Pour over cooled crust.
- Toss peach slices with sugar and cinnamon. Spread evenly over cheesecake layer.
- Sprinkle additional graham cracker crumbs or a simple streusel (butter, flour, brown sugar) on top.
- Bake for 40–45 minutes, until cheesecake is set but slightly jiggly in the center.
- Cool completely, then refrigerate at least 3 hours before slicing into bars.
Pro Tips
I’ve made this Brown Sugar Peach Cake enough times to know the little tricks that take it from “yum” to “oh my goodness, can I have seconds?” Here’s what to keep in mind:
Cut with a hot knife for picture-perfect edges: Run your knife under hot water, wipe it clean, and slice—repeat between cuts. This little trick gives you neat, professional-looking bars worthy of any dessert table.
Bring that cream cheese to room temp: Cold cream cheese will fight you all the way, leaving lumps in your batter. Let it soften on the counter first so it whips up silky smooth and blends perfectly with the other ingredients.
Don’t skip the chill time: I know, waiting is hard when your kitchen smells like peaches and brown sugar heaven. But chilling isn’t optional here—it’s the secret to getting those clean, bakery-style slices that hold together beautifully.
Drain canned peaches really well: If fresh peaches aren’t in season, canned ones are a lifesaver—but make sure you drain them thoroughly. Too much liquid means soggy layers, and no one’s here for that.
Drizzle with caramel sauce for extra wow factor: Right before serving, a little drizzle of caramel takes this cake from homemade comfort food to full-on showstopper. Your guests will think you went all out.
Recipe Variations
This Brown Sugar Peach Cake is already dreamy as-is, but sometimes I like to play around and give it a fresh spin depending on the season, what’s in my pantry, or what mood strikes me. Here are some delicious twists:
Nutty Crunch Add-On: Sprinkle chopped pecans or almonds over the crumble topping before baking. The toasty crunch adds another layer of texture that makes this dessert extra satisfying.
Nectarine or Apricot Swap: Not in peach season? No problem. Nectarines bring the same juicy sweetness with a slightly firmer bite, and apricots add a touch of tartness that balances beautifully with the brown sugar.
Tropical Pineapple Twist: Feeling like you need a little sunshine on your plate? Swap the peaches for pineapple chunks. The tangy-sweet flavor paired with the creamy cheesecake layer gives the whole dessert a tropical vacation vibe.
Shortbread Crust Upgrade: Switch out the graham cracker base for a buttery shortbread crust. It adds an irresistible cookie-like crunch that makes every bite taste like something from a fancy bakery.
Topped with Whipped Cream or Ice Cream: Don’t underestimate the power of toppings! A dollop of lightly sweetened whipped cream keeps it airy, while a scoop of vanilla ice cream turns it into the ultimate summer dessert. Pro tip: serve the cake warm with ice cream for that gooey-meets-creamy combo everyone fights over.
Berry-licious Variation: Mix in a handful of blueberries or raspberries along with the peaches. The tart pops of berry make the bars even more colorful and refreshing.
Gluten-Free Version
Good news—making this Brown Sugar Peach Cake gluten-free is super simple and still just as delicious! All you need to do is swap out the crust.
Texture & Taste: The gluten-free crust bakes up beautifully crisp and holds together well, so you won’t miss a thing. Honestly, no one will even notice the difference—except maybe your gluten-free friends who will thank you a thousand times over for making a dessert they can actually enjoy.
Crust: Use gluten-free graham crackers or a gluten-free shortbread cookie alternative. Crush them just as you would the regular version, and mix with butter for that same buttery, crumbly base.
Filling & Topping: The cheesecake layer, peach filling, and crumble topping are naturally gluten-free, so you don’t have to make any other adjustments. Just double-check that your vanilla extract and any pre-packaged ingredients are certified gluten-free (sometimes fillers sneak in).
Kid-Friendly Version
Kids and fruity desserts are a match made in heaven, and this Brown Sugar Peach Cake is no exception! To make it extra fun (and almost impossible for little ones to resist), try these tweaks:
Family Activity: Let kids help layer the peaches or crumble the topping—it’s a fun (and safe) way to get them in on the baking action.
White Chocolate Drizzle: Melt some white chocolate and drizzle it over the cooled bars. It adds a sweet, candy-like touch that feels special—like dessert from their favorite bakery.
Rainbow Sprinkles: After baking, while the drizzle is still a little tacky, toss on a handful of rainbow sprinkles. Suddenly, your peach cheesecake bars turn into a party!
Mini Portions: Cut the bars into smaller squares or even bite-sized pieces. Little hands love desserts they can grab without a fork.
Peach Cobbler Cheesecake Bars
Ingredients
Equipment
Method
- Preheat oven to 350°F (175°C). Line a 9×13-inch baking pan with parchment paper.
- Mix graham cracker crumbs and melted butter. Press firmly into the bottom of the pan to form the crust. Bake for 8 minutes, then set aside.
- In a large bowl, beat cream cheese, sugar, eggs, and vanilla until smooth. Pour over cooled crust.
- Toss peach slices with sugar and cinnamon. Spread evenly over cheesecake layer.
- Sprinkle additional graham cracker crumbs or a simple streusel (butter, flour, brown sugar) on top.
- Bake for 40–45 minutes, until cheesecake is set but slightly jiggly in the center.
- Cool completely, then refrigerate at least 3 hours before slicing into bars.
Notes
Peach Cobbler Cheesecake Bars – Helpful Tips
Cooking Tips & TechniquesUse room-temperature cream cheese for a silky, lump-free cheesecake layer.
Drain canned peaches well or pat fresh peaches dry to avoid excess moisture in the bars.
Line your baking pan with parchment paper, leaving overhangs — this makes removing and slicing the bars much easier.
Bake until the cheesecake is just set with a slight jiggle in the center; it will firm up as it cools.
Cool completely before slicing to prevent messy edges and let flavors meld. Serving Suggestions
Dust with powdered sugar or drizzle with caramel sauce for a bakery-style finish.
Serve chilled for a firmer bite, or at room temperature for a creamier texture.
Top with whipped cream or a scoop of vanilla ice cream for extra indulgence.
Pair with a cup of coffee, iced latte, or sweet tea for the perfect dessert pairing. Make-Ahead & Storage
Make-Ahead: Prepare the bars a day in advance — they taste even better after resting overnight.
Refrigerator: Store in an airtight container for up to 5 days.
Freezer: Freeze whole or sliced bars for up to 2 months, wrapped tightly in plastic and foil. Thaw overnight in the fridge before serving.
Reheat: Best enjoyed chilled, but you can let them sit at room temperature for 15–20 minutes before serving if desired. Tasty Variations to Try
Cinnamon Sugar Twist: Add a cinnamon-sugar sprinkle on top before baking for a cobbler-style crunch.
Nutty Version: Mix chopped pecans or walnuts into the crumble topping.
Berry Blend: Swap peaches for blueberries, raspberries, or a mix for a fruity twist.
Tropical Vibe: Use peaches with shredded coconut in the topping for a summer spin.
Mini Cheesecake Cups: Make them in muffin tins for individually portioned desserts.
Taste What’s Next
Hawaiian Roll French Toast
Pizza Burgers
Cheesy One Pot Beef and Potatoes
Or you Can Dig Deeper Recipes by clicking this: Appetizer, Breakfast, Lunch, Dinner, and Desserts.
Storage & Reheating
One of the best parts about these Brown Sugar Peach Cheesecake Bars is how well they keep—making them perfect for planning ahead or sneaking a slice days later when the craving hits.
Reheating: These bars are delicious chilled, but if you want to change things up, you can warm a slice in the microwave for 10–15 seconds. The filling softens slightly, the crust gets tender, and the whole thing takes on a cozy, cobbler-like texture. Add a scoop of vanilla ice cream, and you’ve just upgraded your leftovers into a whole new dessert.
Refrigerator: Store the bars in an airtight container for up to 5 days. I like to separate layers with parchment paper so they don’t stick together. They taste just as dreamy cold, straight from the fridge, with that creamy cheesecake bite and juicy peach layer.
Freezer: Want to save some for later? Wrap each bar individually in plastic wrap, then pop them into a freezer bag. They’ll keep beautifully for up to 2 months. Just thaw overnight in the fridge when you’re ready to enjoy. Bonus: frozen bars make a secretly indulgent late-night treat if you can’t wait!
Equipment
Having the right tools makes baking these Brown Sugar Peach Cheesecake Bars a total breeze. You don’t need anything fancy—just the basics you probably already have in your kitchen.
Parchment paper: Line your pan with this, and you’ll thank yourself later. It makes lifting the bars out for slicing so much easier—plus, less mess on cleanup.
9×13-inch baking pan: The perfect size to layer everything and still get those thick, satisfying bars. I love using a glass pan so I can peek at the golden crust as it bakes.
Mixing bowls: A couple of sturdy bowls will keep things moving smoothly—one for the crust and topping, another for the creamy cheesecake layer.
Electric mixer: A hand mixer or stand mixer works here. It whips the cream cheese into that dreamy, silky filling without breaking a sweat.
Rubber spatula: Your best friend for scraping every last bit of batter from the bowl (because wasting cheesecake filling should be a crime).
FAQs (People Also Ask)
Can I make peach cobbler cheesecake bars with canned peaches?
Yes! Just drain them well so the cheesecake layer doesn’t get soggy.
How do you keep cheesecake bars from cracking?
Bake at a steady temperature and don’t overbake—chilling also helps set them smoothly.
Can I make peach cobbler cheesecake bars ahead of time?
Definitely. They taste even better the next day after chilling overnight.
What’s the best way to cut cheesecake bars neatly?
Use a sharp knife dipped in hot water, wiping between each cut.
Can I use frozen peaches for this recipe?
Yes, thaw and pat them dry before layering to prevent extra liquid.
External Resources
Peach Nutrition
The Benefits of Fruit
Food Safety Tips for Eggs
Conclusion
These Peach Cobbler Cheesecake Bars are everything I adore in a dessert: comforting, fruity, creamy, and just a little indulgent. Every bite gives you that sweet peach filling balanced with tangy cheesecake and buttery crust—it’s like summer in dessert form. The best part? They’re easy to slice, easy to share, and guaranteed to make you the star of the dessert table. So grab your peaches and cream cheese, and let’s bake happiness together. And when you do, snap a photo and post it online! Don’t forget to tag me—I can’t wait to see your baking success. Happy baking!