Let’s get one thing straight — I love caramel apples. I mean, what’s not to love? Crisp apples coated in warm, gooey caramel… it’s childhood in one bite. But let’s be honest — traditional caramel apples are a messy business. They’re sticky, hard to eat, and often end up with caramel sliding off before you even take your first bite. So I thought, why not reinvent them into something fun, easy, and way more crowd-friendly? Enter: Easy Sheet Pan Caramel Apples.
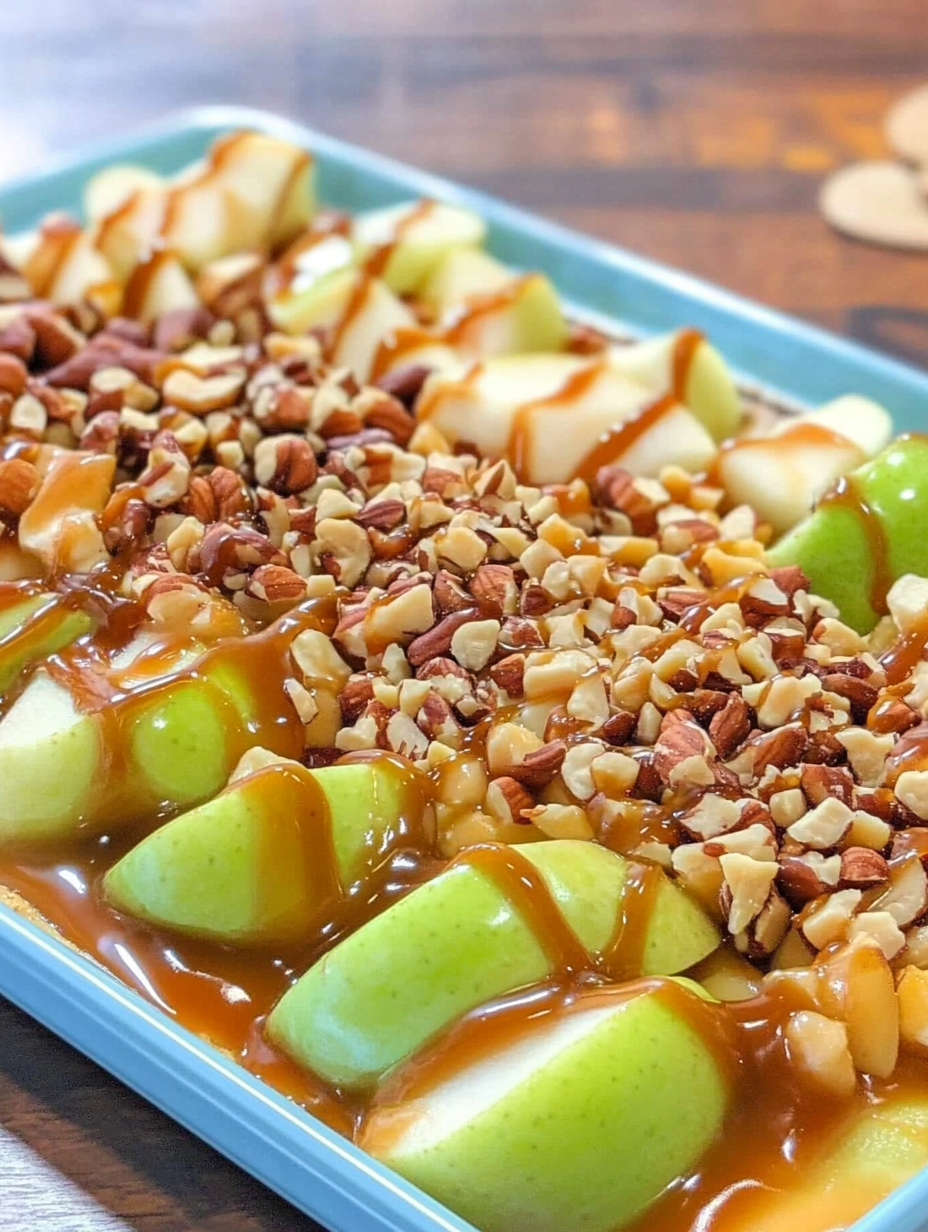
This isn’t your grandma’s candy apple on a stick. This is a modern twist that keeps all the flavor and adds none of the chaos. We’re talking tender apple slices arranged on a baking sheet, slathered in velvety melted caramel, and topped with all kinds of crunchy, colorful goodness. It’s quick to make, crazy delicious, and hands-down one of my favorite fall treats. No boiling sugar, no candy thermometer — just pure caramel bliss.
I’ve served these at Halloween parties, harvest festivals, and even as part of a weekend brunch spread. They’re a hit every single time. Whether you’re looking for a hands-free dessert for kids or a nostalgic snack for grown-up guests, this recipe delivers in every way. And the best part? It all comes together on one trusty sheet pan.
All About This Recipe
Overview
Cuisine: American Fall Treats
Course: Dessert, Snack
Prep Time: 10 minutes
Cook Time: 15 minutes
Total Time: 25 minutes
Serving: Serves 6–8
Nutritional Attributes (Approximate per serving)
Calories: 270 kcal
Carbs: 38g
Fats: 11g
Protein: 2g
Sugar: 31g
Sodium: 80mg
Costing (Approximate)
Total Cost: $1.00–$1.30 per serving
Main cost factors: Apples, caramel, toppings like nuts and candies.
Behind The Recipe
Caramel apples have been a fall tradition in the U.S. for decades — popping up at county fairs, Halloween parties, and apple orchard gift shops. But the idea of baking them flat on a pan? That’s a newer kitchen trend born out of convenience, creativity, and a collective desire to avoid sticky fingers.
Sheet pan caramel apples make this iconic dessert more accessible — especially for kids, parties, or when you just don’t feel like wrangling wooden sticks and boiling sugar. It’s basically a deconstructed caramel apple… but better. This recipe is most often made in the fall, but honestly, I’ve served them year-round. They make a sweet addition to birthday dessert tables, bake sales, and even brunch boards.
Perfect For
- Fall Parties & Halloween Bashes
- These caramel apple slices are practically made for crisp autumn nights and spooky celebrations. Just picture a tray of glossy, candy-covered slices glowing under string lights at your next bonfire bash. Add a few spooky sprinkles and you’re party-ready!
- After-School Snacks
- Want to win MVP of snack time? Hand these out when the kids come home — they’re sweet, fruity, and just the right size for little hands. Plus, no one complains when there’s chocolate and caramel involved.
- Bake Sales & Potlucks
- Looking for something that’ll disappear first from the table? These are your ticket. Bright, glossy, and totally customizable, they stand out in a sea of brownies and cupcakes. Wrap them in cellophane with a ribbon for bonus points!
- Apple Season Magic
- If your kitchen is drowning in apples (hello, orchard trip), this is the recipe that saves the day. It’s a fun and simple way to turn your haul into something irresistible — and you can mix and match varieties for fun flavor combos.
- No-Fuss Entertaining
- They look like a Pinterest masterpiece, but they’re shockingly easy. No baking required, just dipping and decorating. Let guests build their own slice bar and boom — interactive dessert station for the win.
Why You’ll Love This Recipe
- Sheet Pan = Less Mess, More Magic
- Say goodbye to sticky countertops and caramel chaos! This recipe keeps it clean and easy — everything gets prepped and dressed on a single sheet pan. That means less cleanup and more time enjoying your masterpiece (or chasing kids around with wet wipes, we don’t judge).
- DIY Toppings Bar = Maximum Fun
- Let’s be honest — everyone secretly loves a build-your-own dessert moment. Set out bowls of crushed pretzels, mini M&M’s, sprinkles, chocolate drizzle, and nuts, and watch the creativity unfold. It’s like edible arts and crafts, and yes — adults dive in just as enthusiastically as kids.
- Kid-Friendly and Grown-Up Approved
- Sweet enough for little snackers and classy enough for your adult friends. Whether you’re hosting a fall dinner party or a backyard birthday bash, these slices hit the sweet spot for every age group.
- Way Faster Than Traditional Caramel Apples
- No need for dipping entire apples, waiting for them to set, or biting into something the size of a softball. These slices give you all the nostalgic flavor with half the effort — and they’re ready in minutes.
- Gorgeous on Dessert Boards
- When it comes to eye candy, this dessert delivers. Arranged on a platter with other fall favorites — think cookies, nuts, and mini pumpkin pies — these slices shine. They’re colorful, glossy, and look like something straight out of a cozy magazine spread.
Ingredients You’ll Need
Core Ingredients:
4–5 medium apples (Granny Smith, Honeycrisp, or Fuji work great)
1 tablespoon lemon juice (to keep slices from browning)
2 tablespoons butter (for greasing the pan)
1½ cups soft caramel candies (like Kraft or Werther’s)
2 tablespoons heavy cream
Optional Toppings:
Chopped peanuts or pecans
Mini chocolate chips
Crushed pretzels
Mini marshmallows
Sprinkles or candy bits
Sea salt flakes
Ingredient Highlights
Apples: Go tart like Granny Smith for contrast, or sweet like Fuji for candy-like flavor.
Caramel Candies: Pre-wrapped soft caramels melt down easily with cream.
Lemon Juice: Prevents browning and adds a little zing.
Toppings: Totally up to you — go classic or go wild.
Step-by-Step Instructions
1. Prep Your Apples
Wash and core your apples, then slice them into ½-inch thick rounds or wedges. Toss with lemon juice to keep them fresh-looking.
2. Grease & Line the Sheet Pan
Line a large baking sheet with parchment paper and grease it lightly with butter. Trust me — this prevents caramel stickage.
3. Arrange the Apple Slices
Spread the apples out in a single layer on the prepared pan. Try not to overlap — give them room to shine.
4. Melt the Caramel
In a small saucepan over low heat, combine the caramels and cream. Stir until smooth and silky. This takes about 4–5 minutes.
5. Drizzle Like a Boss
Use a spoon to drizzle the melted caramel all over the apple slices. Be generous — it’s caramel!
6. Add the Toppings
While the caramel is still warm, sprinkle your chosen toppings over the apples. This is where the magic happens.
7. Bake Briefly
Pop the pan into a preheated 350°F (175°C) oven for about 8–10 minutes — just enough to soften the apples slightly and fuse the toppings.
8. Cool & Serve
Let everything cool for 5–10 minutes so the caramel sets slightly. Serve warm or room temp. Use a spatula to lift the slices cleanly.
Pro Tips
- Use parchment AND grease. Caramel sticks to everything — double up for success.
- Try caramel apple “nachos” by slicing apples thin and layering toppings like nacho chips.
- Make ahead: Prep everything up to the bake, then pop in the oven when ready to serve.
- Use a small offset spatula for clean lifting without breaking slices.
Recipe Variations
These bars are ridiculously customizable — and trust me, once you make them, you’ll start dreaming up your own spins. Here are a few variations to get your gears turning:
Chocolate Drizzle Version
Once your caramel layer has set, melt about ½ cup of semisweet chocolate chips and drizzle it generously over the top. Let it cool completely for a shiny, rich chocolate finish that adds even more indulgence.
Apple Pie Style
Right before baking, sprinkle the bars with a mix of cinnamon and brown sugar — about 1 teaspoon each. It brings cozy apple pie vibes without the fuss of peeling apples. Bonus: Try adding finely chopped dried apples for a chewy surprise.
S’mores Version
Channel your inner campfire chef: Layer mini marshmallows, a handful of chocolate chips, and crushed graham crackers over the caramel before baking. Broil for the last 1–2 minutes for that toasted marshmallow magic.
Healthier Twist
Need to keep things on the lighter side? Swap the traditional candy topping for a sprinkle of chopped almonds, sunflower seeds, or pistachios. Use dark chocolate (70% or higher) and skip the extra candy altogether — still sweet, still satisfying, but a little more nutrient-dense.
Gluten-Free Version
Gluten-Free Version
Great news — these bars are naturally gluten-free with just a couple of easy swaps!
Use Certified Gluten-Free Pretzels:
Many brands now offer gluten-free pretzel twists or sticks that work beautifully as a crunchy, salty base. Look for ones that stay crisp after baking.
Check All Labels:
Double-check that your caramel candies, chocolate chips, and any candy toppings are labeled gluten-free. Some brands add flour or malt flavoring, so it’s worth the extra minute of scanning.
Gluten-Free Graham Cracker Option (Optional):
Want a more cookie-like base? Crush certified GF graham crackers and mix with a bit of butter to create a delicious crust layer under the pretzels.
Cross-Contamination Caution:
If you’re baking for someone with celiac disease or a gluten allergy, be sure your pans, utensils, and workspace are free from gluten traces.
These simple changes will keep your Caramel Pretzel Bars perfectly crunchy, sweet, and totally safe for gluten-free guests!
Kid-Friendly Version
Get the kiddos involved — this treat was practically made for little hands and big imaginations!
- Use Sweet, Mild Apples:
- Skip the tart varieties and go with naturally sweet apples like Fuji, Gala, or Honeycrisp. They’re crunchy, juicy, and perfectly mellow for younger taste buds.
- Sprinkle Fun:
- Let the kids go wild with toppings — rainbow sprinkles, mini M&M’s, crushed cookies, or even tiny gummy bears. The more colorful, the better!
- DIY Apple Decorating Station:
- Set up a decorating zone with caramel, melted chocolate, and toppings in small bowls. Give each kid their own apple slice on a stick and let them dip, drizzle, and decorate to their heart’s content. It’s part snack, part activity — and all fun!
- Toddler Tip:
- For littler ones, slice apples thin and skip the stick. Serve pre-dipped slices topped with sprinkles for a safer, easier-to-eat version.
- Birthday Party Ready:
- Turn this into a party feature by offering a “Build-Your-Own Apple Slice” bar. Kids love getting creative — and eating their artwork!
Easy Sheet Pan Caramel Apples
Ingredients
Method
- Wash and core your apples, then slice them into ½-inch thick rounds or wedges. Toss with lemon juice to keep them fresh-looking.
- Line a large baking sheet with parchment paper and grease it lightly with butter. Trust me — this prevents caramel stickage.
- Spread the apples out in a single layer on the prepared pan. Try not to overlap — give them room to shine.
- In a small saucepan over low heat, combine the caramels and cream. Stir until smooth and silky. This takes about 4–5 minutes.
- Use a spoon to drizzle the melted caramel all over the apple slices. Be generous — it’s caramel!
- While the caramel is still warm, sprinkle your chosen toppings over the apples. This is where the magic happens.
- Pop the pan into a preheated 350°F (175°C) oven for about 8–10 minutes — just enough to soften the apples slightly and fuse the toppings.
- Let everything cool for 5–10 minutes so the caramel sets slightly. Serve warm or room temp. Use a spatula to lift the slices cleanly.
Notes
Easy Sheet Pan Caramel Apples – Helpful Tips
Cooking Tips & TechniquesUse firm, tart apples like Granny Smith or Honeycrisp for the perfect sweet-and-sour balance.
Slice apples into even wedges—about ½ inch thick—to ensure they hold their shape and are easy to eat.
Pat apple slices dry with a paper towel before adding caramel so the coating sticks properly.
Use store-bought soft caramels or caramel bits melted with a splash of cream for a smooth, dippable texture.
Line your sheet pan with parchment paper and lightly grease it to prevent sticking. Serving Suggestions
Top with crushed peanuts, sprinkles, chocolate chips, cookie crumbs, or a drizzle of melted chocolate.
Serve on popsicle sticks, skewers, or mini forks for easy grabbing.
Perfect for fall parties, Halloween trays, bake sales, or sweet snack boards.
Pair with warm cider, cocoa, or even vanilla ice cream for a fun dessert spread.
Create a caramel apple “bar” where everyone customizes their slice with toppings. Make-Ahead & Storage
Make-Ahead: Prep all toppings and slice apples ahead; dip and decorate closer to serving time.
Refrigerator: Store in a single layer in an airtight container for up to 2 days—caramel may soften over time.
Freezer: Not recommended—apples will lose texture and caramel may crack.
Reheat: No reheating needed—enjoy them at room temp or chilled. Tasty Variations to Try
Chocolate-Dipped: Dip apple slices halfway in melted chocolate before or after caramel.
Cinnamon Sugar Crunch: Sprinkle with cinnamon sugar and crushed graham crackers.
Salted Caramel: Sprinkle with flaky sea salt right after dipping for a sweet-salty contrast.
Apple Nachos: Layer apple slices on a tray, then drizzle caramel and toppings like a dessert platter.
Kid-Friendly Fun: Use colorful candy toppings, mini marshmallows, or cereal bits for a playful twist.
Try This Recipes
Honey BBQ Crockpot Meatballs
Jalapeno Popper Pinwheels
Or you can choose any from Appetizer, Breakfast, Lunch, Dinner and Dessert
Storage & Reheating
These sweet, sticky apple treats are best enjoyed fresh — but if you’ve got leftovers (or made a big batch for a party), here’s how to keep them just right.
Fridge:
Place your caramel apple slices in an airtight container with wax paper or parchment between each layer. This keeps them from sticking together. Store in the fridge for up to 2 days — just be aware the caramel may soften slightly as they sit.
Quick Tip:
Avoid stacking without wax paper — unless you like one giant apple-glued mess (trust me, I’ve been there).
Reheating (if you must):
They’re really meant to be eaten chilled or at room temp. But if you want that just-dipped warmth, pop a slice in the microwave for about 10 seconds. Don’t overdo it or the caramel might melt off completely.
Freezing? Not Recommended:
Freezing caramel apples (or slices) affects the texture and can turn the apples mushy once thawed. Keep these in the fridge and enjoy within a couple days for best results.
Frequently Asked Questions
Can I make caramel apples without sticks?
Yes! This recipe for easy sheet pan caramel apples skips the sticks entirely and serves up clean, bite-sized treats — perfect for kids and crowds.
What apples are best for baked caramel apples?
Tart apples like Granny Smith or sweet-tart Honeycrisp give the best flavor balance and hold their shape when baked.
How do I keep caramel from sliding off apples?
Use parchment paper and grease the pan. Also, let the caramel cool slightly before topping and avoid overbaking.
Can I make these caramel apple slices ahead of time?
Absolutely! You can assemble the apples, drizzle with caramel, and refrigerate. Bake just before serving for best texture.
Do I need to peel the apples first?
Not at all! The peel helps the slices hold their shape and adds color and nutrition. Plus, less prep time for you.
How do I store leftover sheet pan caramel apples?
Place them in a single layer with wax paper between to avoid sticking, and store in an airtight container in the fridge.
Are sheet pan caramel apples healthier than traditional ones?
They can be! You control the toppings, portion size, and avoid extra coatings. Use nuts and dark chocolate for a lighter option.
External Resources (Non-Recipe Sites)
Food Allergy Guide – FARE
Apple Nutrition Benefits – Harvard T.H. Chan School of Public Health
Conclusion
Look, if you’re craving caramel apples but dreading the mess, these Easy Sheet Pan Caramel Apples are your golden ticket. You get the nostalgic flavor, the gooey texture, the satisfying crunch — all in a fun, bite-sized, party-friendly format that’s ready in under 30 minutes. Honestly, once you try this method, you’ll never go back to the stick version again.
Whether you’re making these with your kids, whipping up a platter for a fall celebration, or just need something sweet after dinner, this recipe is easy, fast, and endlessly lovable. Plus, you get to drizzle caramel like a total boss. What’s not to love?
So go ahead — snap a photo and post it online! Don’t forget to tag me! I want to see your cooking success. Happy cooking!