Ingredients
Method
Prep Your Apples
- Wash and core your apples, then slice them into ½-inch thick rounds or wedges. Toss with lemon juice to keep them fresh-looking.
Grease & Line the Sheet Pan
- Line a large baking sheet with parchment paper and grease it lightly with butter. Trust me — this prevents caramel stickage.
Arrange the Apple Slices
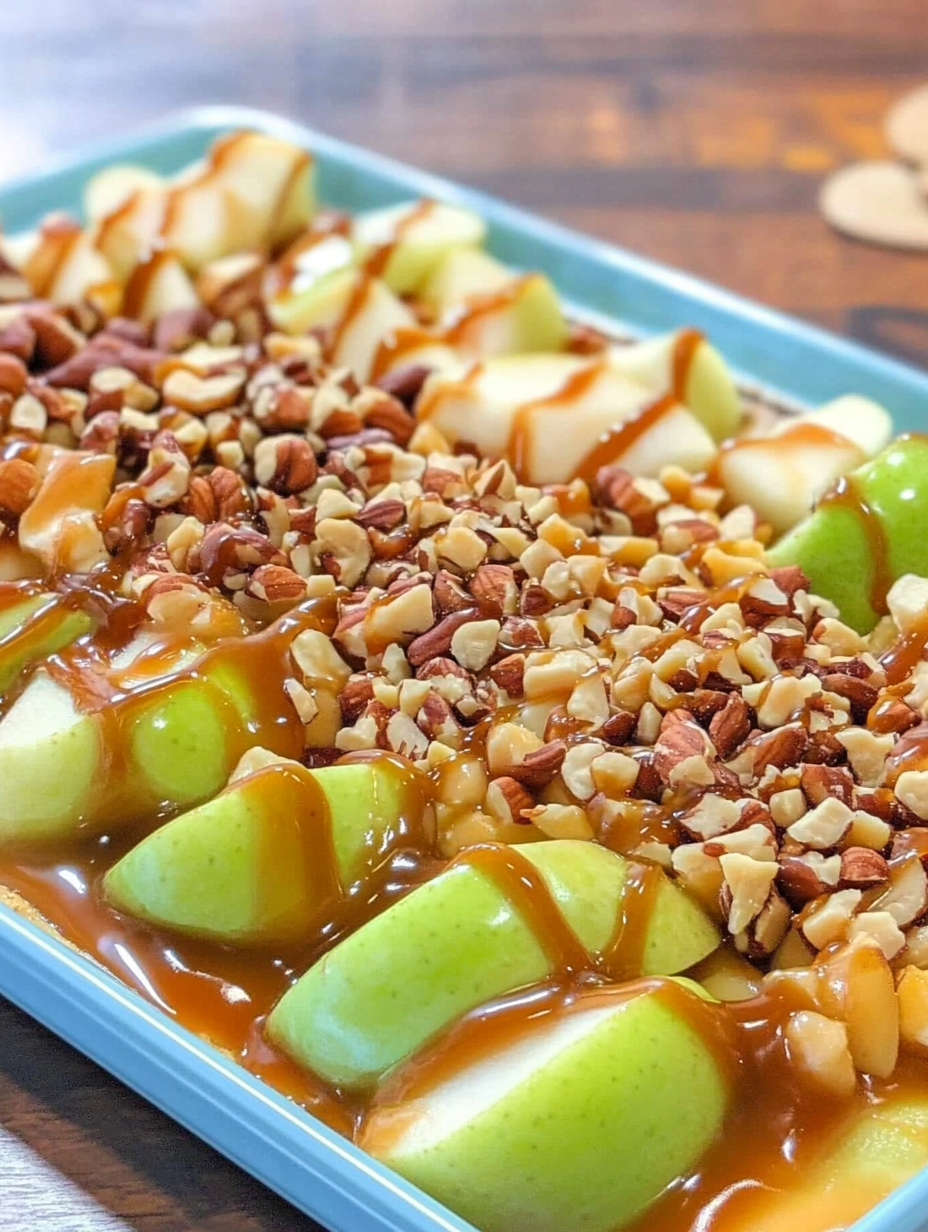
- Spread the apples out in a single layer on the prepared pan. Try not to overlap — give them room to shine.
Melt the Caramel
- In a small saucepan over low heat, combine the caramels and cream. Stir until smooth and silky. This takes about 4–5 minutes.
Drizzle Like a Boss
- Use a spoon to drizzle the melted caramel all over the apple slices. Be generous — it’s caramel!
Add the Toppings
- While the caramel is still warm, sprinkle your chosen toppings over the apples. This is where the magic happens.
Bake Briefly
- Pop the pan into a preheated 350°F (175°C) oven for about 8–10 minutes — just enough to soften the apples slightly and fuse the toppings.
Cool & Serve
- Let everything cool for 5–10 minutes so the caramel sets slightly. Serve warm or room temp. Use a spatula to lift the slices cleanly.
Notes
Easy Sheet Pan Caramel Apples – Helpful Tips
Cooking Tips & TechniquesUse firm, tart apples like Granny Smith or Honeycrisp for the perfect sweet-and-sour balance.
Slice apples into even wedges—about ½ inch thick—to ensure they hold their shape and are easy to eat.
Pat apple slices dry with a paper towel before adding caramel so the coating sticks properly.
Use store-bought soft caramels or caramel bits melted with a splash of cream for a smooth, dippable texture.
Line your sheet pan with parchment paper and lightly grease it to prevent sticking. Serving Suggestions
Top with crushed peanuts, sprinkles, chocolate chips, cookie crumbs, or a drizzle of melted chocolate.
Serve on popsicle sticks, skewers, or mini forks for easy grabbing.
Perfect for fall parties, Halloween trays, bake sales, or sweet snack boards.
Pair with warm cider, cocoa, or even vanilla ice cream for a fun dessert spread.
Create a caramel apple "bar" where everyone customizes their slice with toppings. Make-Ahead & Storage
Make-Ahead: Prep all toppings and slice apples ahead; dip and decorate closer to serving time.
Refrigerator: Store in a single layer in an airtight container for up to 2 days—caramel may soften over time.
Freezer: Not recommended—apples will lose texture and caramel may crack.
Reheat: No reheating needed—enjoy them at room temp or chilled. Tasty Variations to Try
Chocolate-Dipped: Dip apple slices halfway in melted chocolate before or after caramel.
Cinnamon Sugar Crunch: Sprinkle with cinnamon sugar and crushed graham crackers.
Salted Caramel: Sprinkle with flaky sea salt right after dipping for a sweet-salty contrast.
Apple Nachos: Layer apple slices on a tray, then drizzle caramel and toppings like a dessert platter.
Kid-Friendly Fun: Use colorful candy toppings, mini marshmallows, or cereal bits for a playful twist.