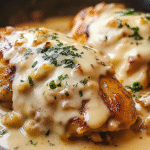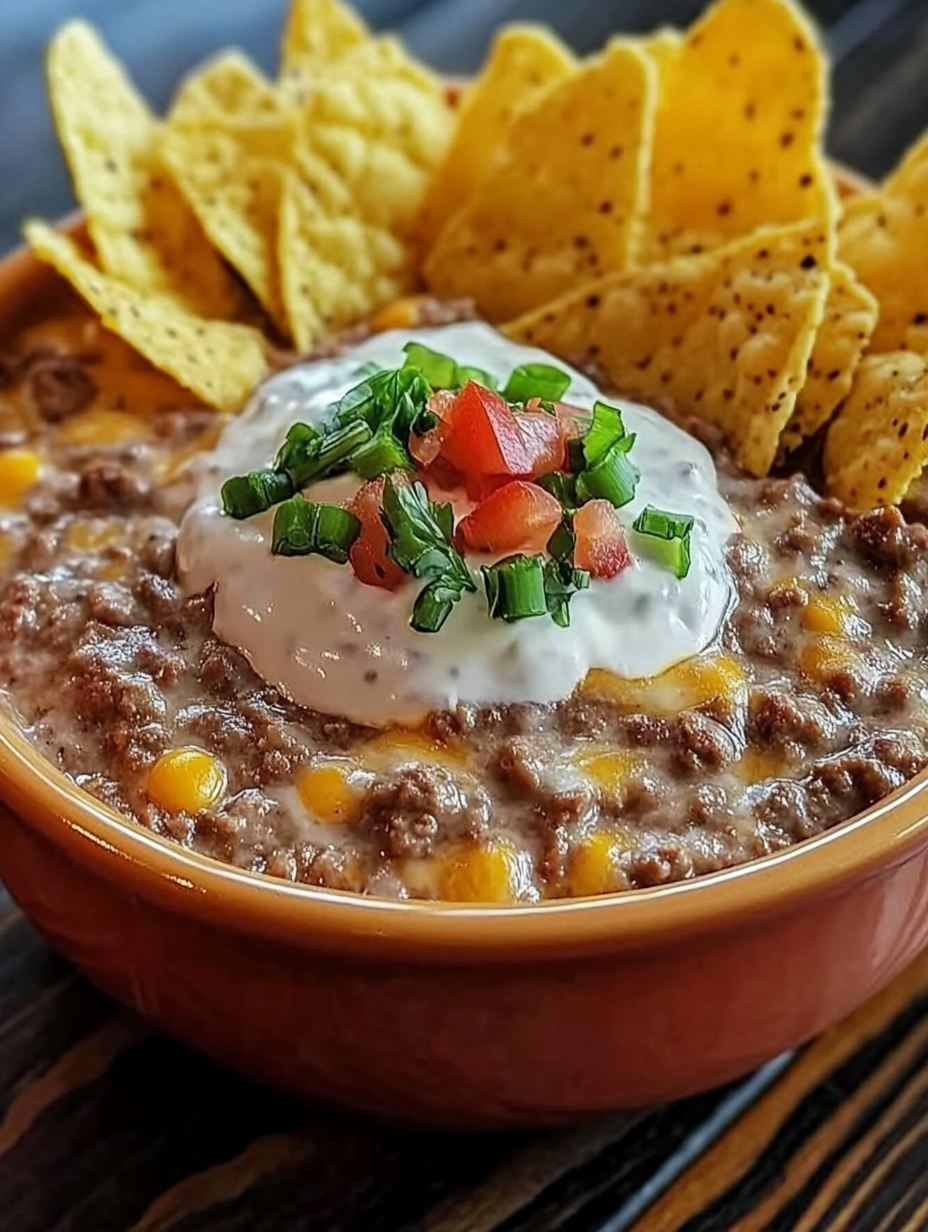
When I say this Meaty Texas Trash Dip is the ultimate party pleaser, I mean it’s the dip that disappears faster than you can say “Tex-Mex takeover!” Imagine layers of creamy, cheesy, meaty goodness bubbling hot from the oven, with scoops of tortilla chips diving in like it’s a snack attack Olympics. It’s rich, bold, and downright addictive. This isn’t your average bean dip, my friend—this is Texas-style, over-the-top, loaded with ground beef, refried beans, cream cheese, and a mountain of shredded cheddar. Perfect for game days, potlucks, or when you just want to treat yourself to a gooey, melty dip that’s as comforting as a big ol’ Texas hug.
I love how this Meaty Texas Trash Dip comes together in no time, but tastes like you’ve been slow-cooking it all day. And the best part? You can make it ahead, keep it warm for hours, or reheat it without losing any of its melty magic. It’s my go-to for when I need a show-stopping appetizer that feeds a crowd without fuss. Alright, let’s crank up that oven and bring the flavor fiesta home!
What’s on the Plate
Overview
- Cuisine: Tex-Mex, American
- Course: Appetizer, Party Dip
- Prep Time: 15 minutes
- Cook Time: 25 minutes
- Total Time: 40 minutes
- Servings: 10-12
What’s in Every Bite
- Calories: 320
- Carbs: 14g
- Fats: 22g
- Protein: 16g
- Fiber: 3g
- Sugar: 2g
- Sodium: 480mg
Total Recipe Cost
- Estimated Total Cost: $12.00
- Cost Per Serving: $1.00 – $1.20
- Main Cost Factors: Ground beef, cheese, cream cheese, beans
The Story Behind the Flavor
Texas Trash Dip has been a staple in Southern kitchens for decades, first making waves in Texan potlucks during the 1970s. Originally, it was a simple layered bean dip, a cousin to the classic 7-layer dip, but with a heartier, meatier twist that screams Lone Star State. The beauty of Texas Trash Dip is its humble beginnings—designed to use pantry staples like refried beans and shredded cheese, but bold enough to become a star dish at tailgate parties and family gatherings.
Over the years, home cooks (like us!) began adding ground beef, spicy seasonings, and even jalapeños to give it that extra punch of flavor. Today, it’s a must-have at game days, Super Bowl parties, and every casual get-together where folks want something warm, cheesy, and irresistibly scoopable. The combination of creamy refried beans, savory seasoned beef, and melty cheese layers makes it a Tex-Mex dream.
Perfect For
This dish isn’t just a meal—it’s a full-blown event starter. Whether you’re feeding a crowd or just making an epic snack for the family, this recipe knows how to show up and show off. Here’s when it’ll be your go-to:
- Game Day Snack Tables
- When the big game is on, you need snacks that can hold their own against all the excitement. This dish is hearty, cheesy, and perfect for piling onto a plate while keeping one eye on the TV. It’s a total crowd-pleaser that’ll have everyone going back for seconds (and thirds).
- Family Movie Nights
- Forget the popcorn (okay, maybe not completely)—this is the kind of cozy, hands-on snack that makes movie night feel special. Serve it up on a platter and let everyone dig in while you all get lost in a family favorite flick.
- Potluck Parties
- Need something that travels well and disappears fast? This dish is a potluck MVP. It’s easy to assemble, holds its flavor even after a car ride, and looks impressive on any party table. Plus, it’s one of those “everyone loves it” kind of recipes.
- Tailgating Spreads
- Nothing says tailgate like finger foods you can enjoy while standing around with friends. This recipe fits right in with all your classic tailgate staples, but brings a little homemade flair that’ll make you the star of the parking lot party.
- Quick & Hearty Appetizers
- Sometimes you need an appetizer that’s a little more filling than chips and dip but still easy and fun to eat. This dish strikes that perfect balance—quick to whip up, hearty enough to satisfy, and guaranteed to vanish from the serving platter.
Why You’ll Love This Recipe
If you’re looking for a dish that brings big flavor with minimal fuss, this is it. This recipe checks all the boxes for busy nights, hungry crowds, and comfort food cravings. Here’s why you’re going to have this one on repeat:
- One Skillet Magic: All the Goodness Baked in One Dish
- No need to juggle a sink full of pans here! This entire beauty comes together in one trusty skillet—from browning the meat to baking the cheesy, bubbly finish. It’s easy, it’s efficient, and you get layers of flavor without layers of dishes to wash.
- Make-Ahead Friendly: Assemble It, Chill It, Bake It When Needed
- Need a no-stress dinner plan? You can assemble this dish in advance, stash it in the fridge, and bake it fresh when you’re ready. It’s perfect for busy weeknights, potlucks, or when you just want to get ahead on tomorrow’s dinner game.
- Ultimate Crowd-Pleaser: Meat, Beans, and Cheese — Who Can Resist?
- This is one of those recipes that brings people back for seconds before they’ve finished their first plate. With hearty seasoned meat, creamy beans, and melty cheese, it hits that perfect comfort food trifecta. It’s family-approved, potluck-perfect, and guaranteed to vanish fast.
- Versatile for Toppings: Jalapeños, Green Onions, Salsa — You Name It
- Make it your own with a topping bar! Whether you love it spicy with jalapeños, fresh with green onions and cilantro, or extra saucy with a drizzle of salsa or sour cream, this dish is a blank canvas for all your favorite add-ons. Let everyone build their perfect bite.
- Comfort Food at Its Best: Warm, Creamy, Cheesy Perfection
- There’s nothing fancy or fussy about this recipe — just pure, cozy satisfaction. Every forkful is packed with melty cheese, savory filling, and that baked-in skillet goodness that makes you want to curl up with a big, hearty portion.
Ingredients You’ll Need
Core Ingredients
- 1 lb ground beef
- 1 can (16 oz) refried beans
- 8 oz cream cheese, softened
- 1 cup sour cream
- 2 cups shredded cheddar cheese
- 1 cup shredded Monterey Jack cheese
- 1 packet taco seasoning
- 1 tsp garlic powder
- Salt and pepper to taste
Optional Add-ins
- Sliced jalapeños
- Diced green onions
- Salsa or pico de gallo for topping
- Fresh cilantro for garnish
- Hot sauce for an extra kick
Ingredient Highlights
- Ground Beef: Brings savory, meaty richness to every bite.
- Refried Beans: The creamy, hearty base that holds it all together.
- Cream Cheese + Sour Cream: Makes it irresistibly smooth and luscious.
- Cheddar & Monterey Jack Cheese: For that golden, melty top layer.
- Taco Seasoning: A quick way to infuse bold Tex-Mex flavors.
Step-by-Step Instructions
- Preheat oven to 350°F (175°C).
- Brown the ground beef: In a large skillet over medium heat, cook the ground beef until browned. Drain excess fat.
- Season the beef: Stir in taco seasoning, garlic powder, salt, and pepper. Mix well.
- Prepare the creamy base: In a large bowl, combine softened cream cheese, sour cream, and refried beans. Mix until smooth.
- Layer the dip: In a 9×13-inch baking dish, spread the creamy bean mixture as the first layer. Top with seasoned ground beef.
- Add the cheese: Sprinkle shredded cheddar and Monterey Jack evenly over the top.
- Bake it up: Bake for 20-25 minutes until bubbly and the cheese is melted and golden.
- Top and serve: Garnish with jalapeños, green onions, salsa, or cilantro. Serve hot with tortilla chips.
Pro Tips
- Use Freshly Grated Cheese for Maximum Melt Factor
- I know, pre-shredded cheese is convenient, but trust me on this one—grating your own cheese makes a huge difference. Pre-shredded blends often come with anti-caking agents that stop it from melting into that ooey-gooey blanket we all crave. Freshly grated cheddar or Monterey Jack melts like a dream and gives you that irresistible cheese pull.
- Spice It Up with Diced Jalapeños in the Meat Layer
- If your crew loves a little heat, toss some fresh diced jalapeños right into the meat mixture while it browns. It infuses the whole dish with a subtle kick that builds as you eat. For extra fiery flavor, leave the seeds in—or go milder by removing them.
- Keep It Warm in a Slow Cooker for Parties
- Hosting a game day bash or potluck? After baking, you can transfer the dish to a slow cooker on the “keep warm” setting. It’ll stay hot, bubbly, and ready for guests to help themselves without you having to reheat it every five minutes.
- Add a Layer of Salsa Between the Beef and Cheese for Extra Sauciness
- Want a saucier, zestier bite? Spread a layer of your favorite salsa right over the seasoned beef and bean layer before topping with cheese. It adds a pop of tangy, smoky flavor and keeps everything extra juicy as it bakes.
- Garnish Last-Minute for Freshness
- Right before serving, sprinkle chopped green onions, fresh cilantro, or a dollop of sour cream on top. The fresh garnishes brighten up the rich, cheesy layers and add that pop of color that makes it look straight out of a restaurant.
Recipe Variations
This dish is the ultimate crowd-pleaser because it’s so easy to tweak for different cravings and occasions. Whether you’re going meatless, turning up the heat, or transforming it into a party dip, these fun variations will keep things fresh and exciting:
- Vegetarian Version
- Want to skip the meat but keep all the hearty goodness? Swap the ground beef for seasoned black beans, pinto beans, or your favorite plant-based meat alternative. You can even add sautéed bell peppers, corn, and onions to bulk it up and bring extra Tex-Mex flair. The result? A super satisfying, protein-packed skillet that’s 100% meat-free and still a total flavor bomb.
- Extra Spicy
- If you’re the kind of person who measures flavor in Scoville units, this variation is calling your name. Stir a few diced chipotle peppers in adobo sauce right into the meat layer for smoky, fiery heat. Drizzle in a little of your favorite hot sauce for an extra kick, and don’t be shy with jalapeños on top. It’s bold, spicy, and will have everyone reaching for a cold drink (and another helping).
- Layered Fiesta Dip
- Want to turn this skillet bake into a full-blown party dip? After baking, load it up with all your favorite toppings: a thick layer of guacamole, a fresh spoonful of pico de gallo, a sprinkle of shredded lettuce, and dollops of sour cream. Grab the tortilla chips and let everyone scoop away! It’s a festive, shareable dish that’s perfect for potlucks, game days, or casual get-togethers.
- Crunchy Topped Bake
- For a little texture twist, sprinkle a layer of crushed tortilla chips or corn chips over the top of the meat layer before adding the cheese and baking. It bakes up golden and crispy, adding a perfect crunch to every cheesy bite.
- Breakfast Skillet Fiesta
- Want to brunch-ify it? Swap the beef for crumbled breakfast sausage, toss in some diced potatoes, and crack a few eggs on top before baking. You’ll have a savory, cheesy breakfast skillet that’s perfect for a breakfast-for-dinner night.
Gluten-Free Version
The great news? This dish is so close to being naturally gluten-free. With just a couple of label checks and easy swaps, you can serve up this cheesy, crowd-pleasing skillet to everyone at the table—no gluten worries needed.
Check Your Taco Seasoning
Store-bought taco seasoning blends are sneaky—some contain hidden gluten in the form of thickeners or anti-caking agents. Make sure to grab a certified gluten-free taco seasoning (or whip up a quick homemade version with chili powder, cumin, paprika, garlic powder, and a pinch of salt). That way, you control exactly what goes in.
Use Gluten-Free Refried Beans
Refried beans are another ingredient that can sometimes hide gluten, especially canned varieties that use wheat-based additives as thickeners. Look for gluten-free labeled refried beans or go for brands that stick to simple, whole ingredients like pinto beans, oil, and seasonings.
Everything Else is Naturally Gluten-Free
The beauty of this recipe? The rest—ground beef, cheese, fresh veggies, salsa—is naturally gluten-free. As long as you double-check the labels on any packaged ingredients (like broth or pre-shredded cheese if you use it), you’re good to go.
Optional Pro Tip: If you’re adding a crunchy topping, make sure to use gluten-free tortilla chips or corn chips to keep the entire dish safe and delicious for everyone.
Kid-Friendly Version
This cheesy skillet bake is already a kid-favorite in the making, but with just a couple of simple tweaks, you’ll have even the pickiest eaters diving in with their tortilla chips (or even spoons!). Here’s how to make it extra kid-approved:
Skip the Jalapeños and Hot Spices
Kids and spicy don’t always mix, so go easy on the heat. Simply leave out the jalapeños, hot sauce, and any spicy seasoning blends. Stick to the mild, savory taco flavors—plenty of flavor without any fiery surprises.
Mild & Creamy Wins
Lean into the cheesy, creamy goodness. You can even stir in a little extra sour cream or a dollop of cream cheese into the filling to make it ultra-smooth and mellow. Kids will love the soft, melty texture paired with the familiar taco flavors.
Serve as a Dip with Tortilla Chips
Kids LOVE dipping! Scoop the cheesy skillet mixture into a bowl and let them use tortilla chips or soft mini tortillas as dippers. It turns dinner into a fun, interactive experience (and buys you a few quiet minutes while they focus on scooping every bite).
Add Fun Toppings They Can Sprinkle
Set up a small topping bar with bowls of shredded lettuce, diced tomatoes, mild shredded cheese, and maybe even crushed tortilla chips. Let them top their own plate—it makes them more excited to eat it when they’ve helped build their plate.
Make Mini Taco Cups for Smaller Portions
For little hands, you can spoon the filling into mini taco shells or bake it in muffin tins lined with soft tortillas. It’s the perfect grab-and-go size for small eaters, and way less messy on busy weeknights.
Meaty Texas Trash Dip
Ingredients
Equipment
Method
- Preheat oven to 350°F (175°C).
- Brown the ground beef: In a large skillet over medium heat, cook the ground beef until browned. Drain excess fat.
- Season the beef: Stir in taco seasoning, garlic powder, salt, and pepper. Mix well.
- Prepare the creamy base: In a large bowl, combine softened cream cheese, sour cream, and refried beans. Mix until smooth.
- Layer the dip: In a 9×13-inch baking dish, spread the creamy bean mixture as the first layer. Top with seasoned ground beef.
- Add the cheese: Sprinkle shredded cheddar and Monterey Jack evenly over the top.
- Bake it up: Bake for 20-25 minutes until bubbly and the cheese is melted and golden.
- Top and serve: Garnish with jalapeños, green onions, salsa, or cilantro. Serve hot with tortilla chips.
Notes
Meaty Texas Trash Dip – Helpful Tips
Choose the Right Meat- Ground beef is classic, but you can swap in ground turkey, sausage, or even chorizo for a spicier, smoky twist.
- Be sure to drain excess grease after browning to keep the dip rich, not oily.
- Soften your cream cheese to room temp for easy mixing—nobody likes a lumpy dip!
- Mix in sour cream and refried beans until smooth and fluffy before layering on the toppings.
- Want extra creaminess? Add a splash of half-and-half or heavy cream to loosen the texture.
- After spreading the creamy bean layer, top with your seasoned meat, then pile on the shredded cheese.
- Mix up the cheese with a combo of cheddar, Monterey Jack, and a sprinkle of pepper jack for a melty, cheesy crust.
- Bake uncovered at 350°F until the cheese is bubbling and golden, about 20–25 minutes.
- For extra color, broil for the last 1–2 minutes—just keep an eye on it!
- Serve hot with sturdy dippers like tortilla chips, pita chips, or toasted baguette slices.
- Garnish with sliced jalapeños, diced tomatoes, green onions, or a dollop of sour cream for extra flair.
- This dip is a hit for game day, potlucks, or any “bring a dish” party.
- Assemble the entire dip (without baking) up to 24 hours in advance—cover and refrigerate, then bake fresh.
- Leftovers? Store in an airtight container in the fridge for up to 3 days.
- Reheat in the oven or microwave, but stir halfway through to keep it creamy.
- Mix in a can of green chilies or fire-roasted tomatoes for a Tex-Mex boost.
- Swap refried beans for black beans or pinto beans for a chunkier texture.
- Want it spicy? Add a layer of jalapeño cream cheese spread before baking.
- Make it a meal by serving it in soft taco shells or over a bed of lettuce for “dip bowls.”
Taste What’s Next
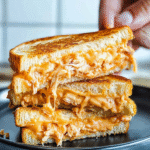
Cranberry Brie Bites
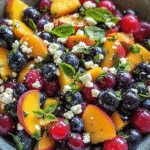
Blueberry Peach Feta Salad
Fresh Cucumber Caprese Salad
or you Can Dig Deeper Recipes by clicking this: Appetizer, Breakfast, Lunch, Dinner, and Desserts.
Storage & Reheating
Made a big batch? Perfect. This dish was born to be enjoyed as leftovers, and it reheats like a dream. Here’s how to store and bring it back to melty, cheesy perfection:
- Fridge Storage
- Once the skillet has cooled down, transfer leftovers into an airtight container and pop them in the fridge. They’ll stay fresh and delicious for up to 4 days. If you’re planning ahead for busy weeknights, this dish makes an awesome make-ahead option—just reheat and serve!
- Freezing (Optional)
- While this dish is best enjoyed fresh, you can freeze portions if you like. Spoon servings into freezer-safe containers or zip-top bags, flattening them out for easy storage. Freeze for up to 1 month. Just know the texture may get a little softer after thawing, but it’ll still taste amazing.
- Reheating Tips
- For quick meals, microwave individual portions in 30-second bursts, stirring between each until hot and melty. If reheating a larger amount or you want that fresh-baked feel, pop it into a 350°F oven for 10-15 minutes, covered loosely with foil to prevent it from drying out. Remove the foil for the last few minutes to get the cheese on top bubbly again.
- Pro Tip: Add a splash of salsa or a dollop of sour cream when reheating to freshen up the flavors and keep everything creamy.
Equipment
- Large skillet
- Mixing bowls
- 9×13-inch baking dish
- Spatula
FAQs
Can Meaty Texas Trash Dip be made ahead of time?
Absolutely! Assemble everything a day ahead, cover, and refrigerate. Bake when ready to serve.
How do I keep Texas Trash Dip warm for a party?
Transfer the baked dip to a slow cooker on a warm setting.
Can I freeze Texas Trash Dip?
It’s best enjoyed fresh, but you can freeze it before baking. Thaw overnight in the fridge and bake as directed.
What chips pair best with Meaty Texas Trash Dip?
Sturdy tortilla chips are perfect. You can also use veggie sticks or pita chips.
Can I use ground turkey instead of beef?
Yes! Ground turkey is a leaner option and works wonderfully.
External Resources
Conclusion
When you need a no-fuss, over-the-top, crowd-pleasing dip that guarantees empty bowls, Meaty Texas Trash Dip is your go-to hero. It’s cheesy, creamy, meaty, and absolutely perfect for any gathering where good food and good times are on the menu. Once you try it, you’ll never go back to plain old dips again.
So go ahead — snap a photo and post it online! Don’t forget to tag me! I want to see your cooking success. Happy cooking!