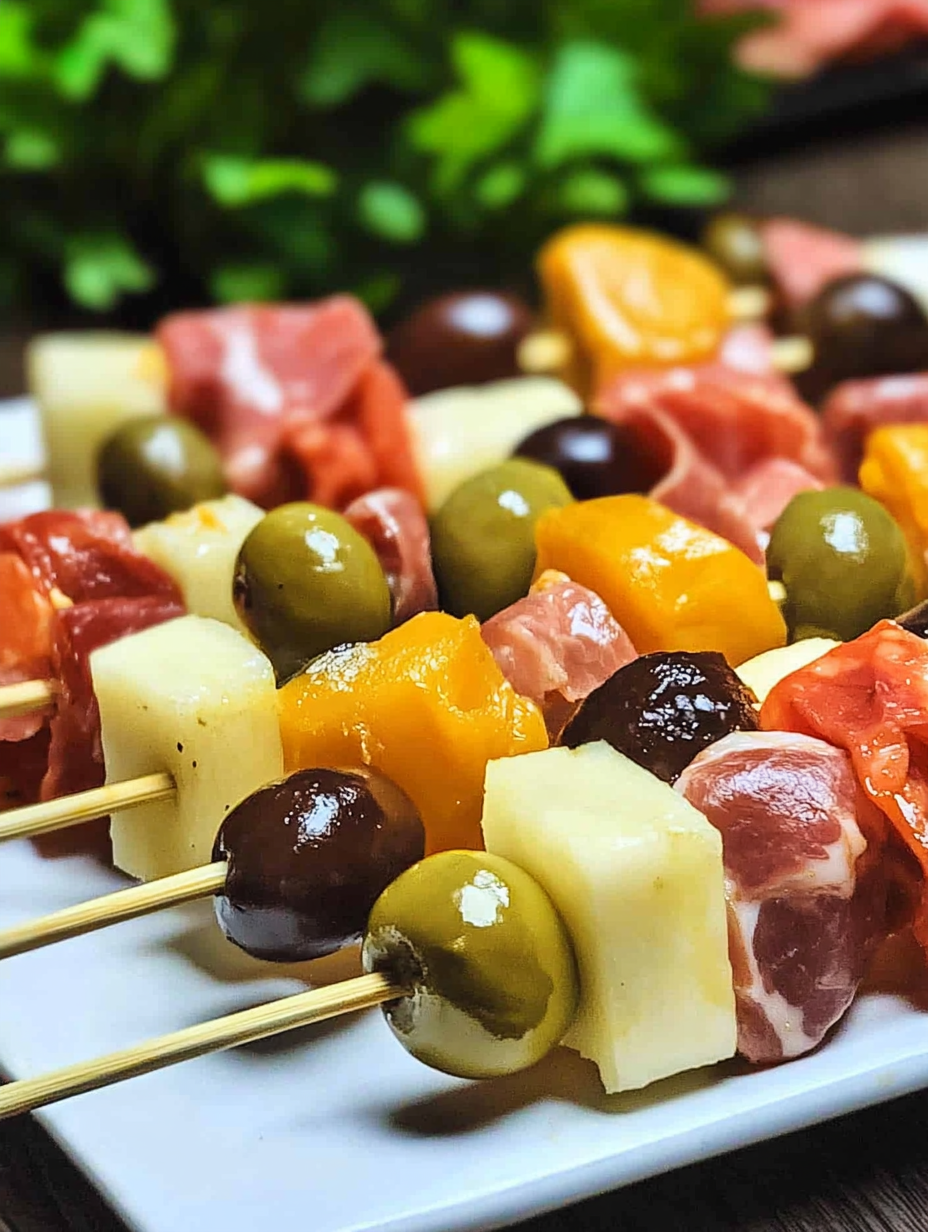
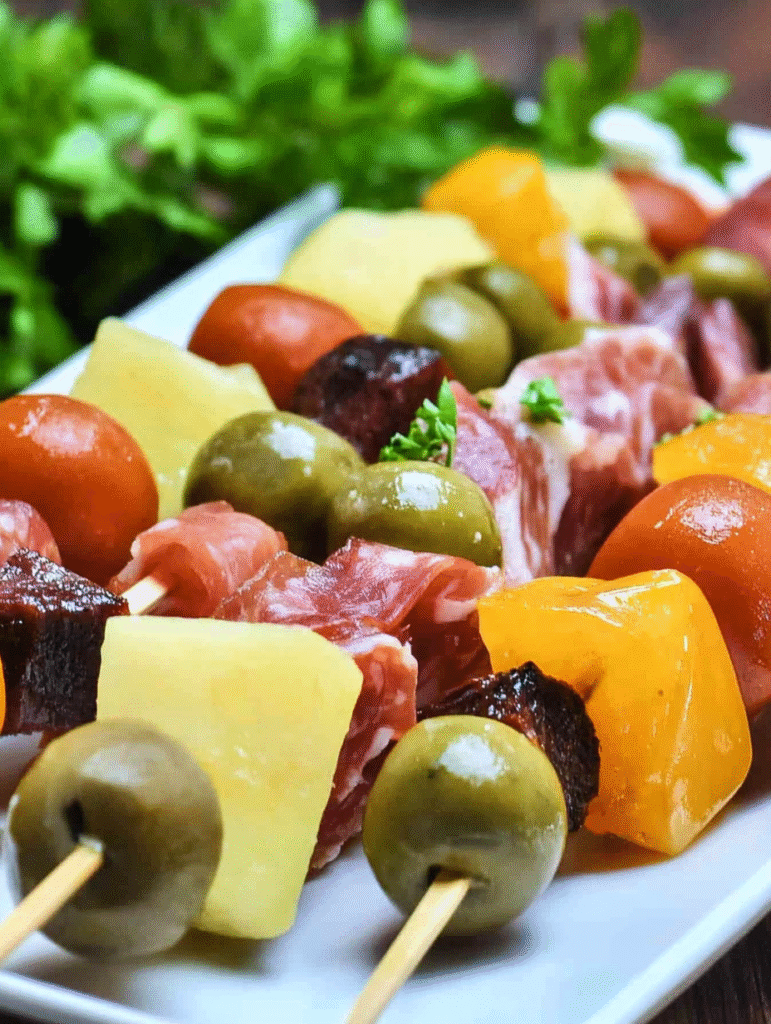
I’m seriously hooked on charcuterie skewers—bite-sized flavor bombs that look stunning, taste delicious, and require zero cooking. I still remember the first time I shared these at a backyard party: everyone kept coming back for more—cheese, meat, fruit, repeat. That moment sealed the deal. These elegant skewers are the easiest party trick I have up my sleeve.
With just a handful of ingredients—cubed cheese, folded cured meats, olives, grapes, and roasted peppers—you can assemble trays of these charcuterie skewers in minutes. They shine as party skewers, make perfect no-cook appetizers, and save you the hassle of carving up a big board. They’re portable, customizable, and carry all the flavors of a charcuterie board in one perfect bite. Whether you’re hosting game night, a wedding shower, or simply craving easy charcuterie ideas, these skewers deliver every time.
I keep a stash of salami, cheddar, grapes, and olives on hand, so whenever inspiration hits, I can whip these together in fifteen minutes flat. They’re visually pleasing but low-effort—great for both elegant gatherings and casual family snacks. Let’s dive in and build some classy yet comfy charcuterie skewers.
What’s on the Plate
Overview
Cuisine: No-Cook Appetizer / Party Food
Course: Appetizer, Snack, Party Bites
Prep Time: 15 minutes
Total Time: 15 minutes
Servings: about 20 skewers
What’s in Every Bite
Calories: ~80 kcal
Protein: 4 g
Fat: 5 g
Carbohydrates: 2 g
Sugar: 1 g
Sodium: 220 mg
Fiber: 0.5 g
Total Recipe Cost
Approximate Cost: $12 USD
Cost Per Skewer: ~$0.60
Major cost factors: cured meats, cheeses, fruit
The Story Behind the Flavor
While traditional charcuterie boards date back to centuries of European entertaining, charcuterie skewers emerged more recently—around the early 2000s—as a fun, portable twist for parties and events. No cutting, no communal utensils: just insert meat, cheese, fruit, or veggies onto a skewer and voilà—a perfect bite.
I first developed my version of charcuterie skewers during a busy summer barbecue. I wanted something that looked elegant but required minimal prep. These skewers flew off the tray faster than I could set them out. I’ve since evolved the idea for holidays, shower buffets, and even kid-friendly lunchboxes. The flavor is timeless, the presentation is clean, and guests can grab a perfectly balanced bite without hesitation.
Perfect For
- Cocktail Parties or Showers:
- Looking to wow your guests without a complicated menu? These skewers are bite-sized, elegant, and pair beautifully with wine or bubbly. They offer just enough richness and flavor to elevate your spread, and they’re easy to hold and nibble — no forks, plates, or napkin juggling required. Perfect for bridal showers, baby showers, or even a chic brunch buffet.
- Game-Night Snacks and Grazing Tables:
- Skip the messy dips and greasy chips — these are built for fingers and big flavors. Pile them onto a platter with other easy bites and you’ve got a grazing table that keeps everyone snacking happily between plays or rounds of cards. Bonus: no one’s stuck in the kitchen flipping wings or refilling bowls.
- Easy Charcuterie Ideas or No-Cook Appetizers:
- Charcuterie boards are the MVP of modern entertaining, and these skewers are a genius addition. They bring texture, color, and variety with practically zero prep. Plus, they’re pre-portioned and mess-free, which means your guests can grab and go — and you can spend less time assembling and more time sipping wine.
- Picnic Snacks or Outdoor Entertaining:
- Headed to the park, the beach, or your backyard patio? These skewers are portable, sturdy, and hold up well without refrigeration for a bit, making them perfect for outdoor snacking. Tuck them into your picnic basket or serve them on a patio platter — no melting, no wilting, no stress.
- Kid-Friendly Charcuterie Skewers in Lunch Boxes:
- Want to jazz up lunch for your little foodies? These mini skewers are fun to eat, colorful, and endlessly customizable. Load them with cheese cubes, turkey bites, grape tomatoes, or fruit — whatever your kid loves. They’re easy to pack, and best of all, they actually get eaten. (Bonus points for being “cool” enough to trade on the lunch table.)
Why You’ll Love This Recipe
- No Cooking — Just Assemble and Serve:
- Let’s hear it for no-prep brilliance! There’s no stove, oven, or microwave required — just a few simple ingredients, a cutting board, and some skewers. You can whip up a full tray in minutes, making it the ultimate solution for last-minute guests, potlucks, or busy weeknights when “cooking” just isn’t in the cards.
- Gorgeous Bite-Sized Presentation:
- These skewers may be small, but they come to slay. With colorful layers, bold ingredients, and neat presentation, they make any platter look instantly elevated. From elegant brunches to kids’ lunchboxes, they’re picture-perfect and totally Instagrammable — no garnish necessary.
- Huge Flexibility with Flavors and Fillings:
- This is where it gets fun. You can mix and match cheeses, cured meats, fruits, pickles, veggies, or even sweets depending on your theme. Want Italian? Think mozzarella, salami, and cherry tomatoes. Going kid-friendly? Use cheddar, grapes, and turkey bites. The possibilities are endless, and you can build a version for every taste, diet, or season.
- Keeps Well for Make-Ahead Prep:
- Planning ahead? These little skewers are your new best friend. You can assemble them a few hours (or even the night) before your event and they’ll hold up beautifully in the fridge, tightly covered. No last-minute scrambling, no wilting, no sogginess — just grab and go.
- Ideal for Portion-Controlled Grazing:
- Charcuterie is delicious… but dangerously easy to overdo. These skewers solve that with built-in portion control. Each one is balanced and satisfying — a perfect bite that lets you enjoy a variety of flavors without going overboard. They’re fun, flavorful, and mindful eating at its tastiest.
Ingredients You’ll Need
Core Ingredients
- 8 oz cheddar cheese, cubed
- 8 oz gouda or pepper jack, cubed
- 6 oz salami or prosciutto, folded
- 1 cup green grapes, halved
- 1 cup roasted red peppers, sliced
- 1 cup olives (green or Kalamata)
- Wooden skewers or toothpicks (20–30)
Optional Add‑Ins
- Mini pickles or cornichons
- Cherry tomatoes
- Marinated artichoke hearts
- Cubes of smoked sausage or tofu
- Fresh basil, mint leaves, or edible flowers
Ingredient Highlights
Cubed Cheese: Bold flavors like cheddar or gouda add texture.
Folded Meats: Salami or prosciutto holds shape and balances cheese.
Fruit & Olives: Provide sweet, briny contrast in every bite.
Roasted Peppers: Bright, colorful, and packed with flavor.
Step-by-Step Instructions
- Prep: Cube cheese, halve grapes, fold meats neatly.
- Thread Skewers: Use olive → cheese → meat → grape → pepper pattern for balanced flavors.
- Display: Arrange skewers on serving platters or trays.
- Serve or Chill: Keep chilled until ready to serve; ideal up to 4 hours ahead.
Pro Tips
- Keep Ingredients Chilled for Clean Bites:
- Cheese that’s too soft or meats that sit out too long can make assembly a mess. Chill all your ingredients before threading so everything holds its shape. Cold cheese slices won’t smudge, fruit stays juicy and firm, and your final skewers will look crisp and clean — not squished or greasy.
- Cut Everything to a Uniform Size for Easy Threading:
- No one wants a skewer that falls apart mid-bite. Make sure all your components are bite-sized and evenly cut so they thread smoothly and stay put. Aim for cubes or slices around 1 inch wide — enough to grab, chew, and enjoy in one or two bites without making a mess.
- Alternate Salty, Sweet, and Savory for Balance:
- Treat each skewer like a mini flavor journey. Balance cured meats with mild cheese, tuck in a juicy grape or tangy pickle, and follow it up with a slice of something rich or smoky. This keeps every bite interesting and satisfying — not just a cheese stick on a stick.
- Soak Wooden Skewers if Serving Outdoors:
- If you’re serving these beauties al fresco (think picnics, BBQs, or park parties), be sure to soak wooden skewers in water for 10–15 minutes beforehand. This prevents them from drying out, splintering, or picking up funky smells from the air — and keeps your presentation fresh and polished.
- Garnish Your Platter with Herbs or Edible Flowers for Flair:
- Never underestimate the power of a good garnish. Lay out your finished skewers on a tray and tuck in sprigs of rosemary, basil, thyme, or even edible flowers like nasturtiums or pansies. It adds color, fragrance, and that effortless “host with the most” vibe that makes your appetizer table pop.
Recipe Variations
- Kid-Friendly Charcuterie Skewers:
- For little hands and smaller appetites, keep things simple and familiar. Go with mild cheddar or mozzarella cubes, sliced turkey or ham rolls, and juicy seedless grapes or apple chunks. Add a pretzel stick in place of the skewer for a crunchy, edible twist! These are perfect for lunchboxes, after-school snacks, or party platters with a younger crowd in mind.
- Holiday Skewers:
- Bring a little seasonal magic to the platter! For Thanksgiving or Christmas, replace grapes with fresh cranberries, dried apricots, or even candied pecans. Thread in a sprig of rosemary for an aromatic, evergreen flair. Use red and green ingredients for instant holiday cheer — think cherry tomatoes and basil, or green olives and red bell peppers.
- Fruit & Cheese Kabobs:
- Want a lighter, fresher twist? Go sweet and juicy with strawberries, melon balls, pineapple, or blueberries alongside mild cheeses like mozzarella, brie, or gouda. Perfect for brunch spreads, baby showers, or summer snacks, these kabobs are refreshing and colorful — basically dessert and appetizer in one perfect bite.
- Make-Ahead Skewers:
- Hosting a party or prepping for a busy day? These skewers hold up beautifully. Assemble your favorites up to 4 hours in advance, cover them tightly with plastic wrap or store in an airtight container, and refrigerate. Avoid watery ingredients like cucumber or juicy tomatoes if prepping ahead — they can leak and soften nearby bites.
- Vegetarian Without Meat:
- Skipping the meat? You won’t miss it. Layer your skewers with grilled or roasted vegetables (think zucchini, bell peppers, or cherry tomatoes), tofu cubes, stuffed olives, or a medley of cheeses. Add a drizzle of balsamic glaze or a side of hummus or pesto for a flavor boost that brings the whole skewer to life.
Gluten-Free Version
Good news: these charcuterie skewers are naturally gluten-free, making them a perfect party option for guests with gluten sensitivities or celiac disease — no swaps required! But like any good chef knows, it’s not just what’s in your ingredients, but where they’ve been.
Check Your Cheese:
Most cheeses are naturally gluten-free, but it’s important to double-check labels — especially for shredded, processed, or flavored varieties. Some pre-shredded cheeses contain anti-caking agents with hidden gluten, and certain cheese spreads or dips may use wheat-based thickeners. Stick with block cheeses you shred yourself or certified gluten-free brands to be safe.
Watch the Meats:
Cured meats like salami, prosciutto, and deli turkey are typically gluten-free, but again, watch for additives or flavorings that could contain wheat or barley. Choose brands that clearly label their products gluten-free and avoid any meats with breadcrumbs, fillers, or vague “natural flavoring” on the label unless confirmed safe.
Don’t Forget the Olives & Extras:
Olives are generally gluten-free, but those marinated in fancy oils or flavor blends might be processed alongside gluten-containing products. Look for plain, brined olives from reliable brands. The same rule applies to things like pickles, roasted peppers, and spreads — always read the fine print.
Keep Prep Surfaces Clean:
If you’re making both gluten and gluten-free versions for a crowd, be sure to use separate cutting boards and utensils to avoid cross-contamination. It only takes a breadcrumb to cause a reaction for someone with celiac, so keep your GF skewers extra safe.
Kid-Friendly Version
Stick to Familiar, Mild Flavors:
Kids usually prefer mellow tastes, so reach for mild cheeses like mozzarella, Colby Jack, cheddar, or even string cheese cut into chunks. Folded deli meats like turkey, ham, or roast chicken make great additions and are easy for little hands to manage. Think of it as a lunchable — only fresher, better, and way more fun.
Add Naturally Sweet Fruit:
Skip fancy spreads and go for grapes, apple slices (tossed in lemon juice to prevent browning), or strawberries. These sweet elements make the skewer feel like a treat, plus they balance the salty, savory bites. Bonus: fruits also add juicy color to the skewer, which kids love.
Throw In Veggies That Crunch (and Munch):
Add a pop of freshness with cherry tomatoes, cucumber slices, or baby carrots cut into rounds. These veggies are colorful, crisp, and hold up well on a skewer. And hey — if you add a fun dip on the side like ranch or hummus? You’re suddenly a lunchbox legend.
Use Mini Skewers or Toothpicks for Safety:
Swap full-length skewers for toothpicks or short appetizer picks that are safer and easier for kids to handle (especially younger ones). You can even find blunt-edged or reusable bento-style sticks that make eating fun without the pokes.
Make It a DIY Snack Kit:
For a school lunch or road trip, turn it into a little activity! Pack the components separately in a lunchbox compartment and let your kid build their own skewers — it gives them a sense of choice, keeps textures fresh, and turns snack time into something interactive and exciting.
Charcuterie Skewers
Ingredients
Method
- Cube cheese, halve grapes, fold meats neatly.
- Use olive → cheese → meat → grape → pepper pattern for balanced flavors.
- Arrange skewers on serving platters or trays.
- Keep chilled until ready to serve; ideal up to 4 hours ahead.
Notes
Charcuterie Skewers – Helpful Tips
Cooking Tips & TechniquesUse sturdy skewers or cocktail picks (6–8 inches long) to hold everything together without breaking.
Fold cured meats like salami or prosciutto into ribbons or rosettes for a classy, bite-sized look.
Pair cheeses with contrasting textures—soft brie or mozzarella balls with firm cheddar or gouda.
Add visual pop with colorful ingredients: cherry tomatoes, stuffed olives, baby pickles, grapes, or dried apricots.
Drizzle lightly with balsamic glaze or olive oil right before serving for extra flavor and shine. Serving Suggestions
Serve chilled or at cool room temp—arrange on a large platter, standing upright in mason jars, or laid flat on a wooden board.
Perfect for parties, showers, brunch spreads, picnics, or holiday appetizers.
Pair with a glass of wine, bubbly, or a fruity mocktail.
Label with mini tags or color-code for different flavor combos.
Offer dipping sauces on the side—like honey mustard, pesto, or fig jam. Make-Ahead & Storage
Make-Ahead: Assemble up to 24 hours ahead. Wrap tightly and refrigerate until ready to serve.
Refrigerator: Store leftovers in an airtight container for up to 3 days.
Freezer: Not recommended—cheese and fresh produce lose texture after thawing.
Reheat: Not needed—these are served cold or at room temp. Tasty Variations to Try
Mediterranean Style: Add marinated artichokes, sun-dried tomatoes, feta cubes, and Kalamata olives.
Sweet & Savory: Skewer with dark chocolate chunks, strawberries, and sharp cheese.
Caprese Inspired: Mozzarella balls, cherry tomatoes, fresh basil leaves, and a balsamic drizzle.
Brunch Skewers: Use mini pancakes, bacon, berries, and cheese cubes for a fun morning twist.
Spicy Kick: Add hot soppressata, pepper jack cheese, and pickled jalapeños.
Taste What’s Next
Fruit Salsa with Cinnamon Sugar Tortilla Chips
Honey BBQ Crockpot Meatballs
Jalapeno Popper Pinwheels
or you Can Dig Deeper Recipes by clicking this: Appetizer, Breakfast, Lunch, Dinner, and Desserts.
Storage & Reheating
One of the best things about these charcuterie skewers? They’re totally no-fuss when it comes to storage. No reheating, no soggy regrets — just smart handling and a little chill time to keep everything crisp and fresh. Whether you’re prepping for a party or packing a few for lunch, here’s how to store and serve like a pro:
- Refrigerate:
- If you’re making these ahead of time, you’re in luck — they hold up beautifully in the fridge for short stretches. Assemble your skewers, cover them tightly with plastic wrap or store in an airtight container, and refrigerate for up to 4 hours. Just make sure your ingredients (especially cheese and meat) are well-chilled before assembling so they stay firm and fresh.
- Serve at Room Temperature:
- Charcuterie is all about flavor, and it shines best when served slightly below room temp. Pull your skewers out of the fridge about 30–60 minutes before serving to let the cheese soften just enough and the flavors bloom. Just don’t let them sit out too long — after about an hour, fruits can start to sweat and cheese may soften too much or dry out.
- No Reheating Needed:
- This recipe is the definition of grab-and-go greatness — no oven, no microwave, no hassle. Everything on the skewer is designed to be eaten chilled or at room temp, making it ideal for entertaining, lunchboxes, or park picnics. Simply plate, serve, and snack away.
- Chef’s Tip:
- If you’re serving these outdoors or in warm weather, nestle your platter over a tray of ice, or serve smaller batches and replenish as needed. This keeps everything safe, tasty, and picture-perfect — even under the sun.
Equipment
- Cutting board & knife
- Wooden toothpicks or skewers
- Serving platter or tray
- Small bowls for optional extras
FAQs
What do you put on charcuterie skewers?
You can put small cubes of cheddar or gouda cheese, folded salami or prosciutto, grapes, olives, and roasted peppers to make perfect bite-sized meat and cheese skewers.
How far in advance can I make charcuterie skewers for a party?
You can prepare make-ahead charcuterie skewers up to 4 hours before serving. Store them covered in the fridge to preserve freshness and keep ingredients crisp.
Can charcuterie skewers be refrigerated?
Yes, charcuterie skewers can be refrigerated safely for a few hours before serving—just cover them well so the cheese or fruit doesn’t dry out.
What’s the best cheese for charcuterie skewers?
Cheddar, gouda, pepper jack, and Monterey Jack are excellent picks; they hold shape well and pair beautifully with meats and fruits.
How to make charcuterie skewers for a party?
Create skewers using cubed cheese, folded cured meats, grapes, and olives. Arrange them beautifully on a tray for an eye-catching and practical appetizer.
External Resources
Conclusion
There’s a magical simplicity to charcuterie skewers—they look polished, taste gourmet, and come together in just minutes. Whether you’re feeding a crowd, packing snacks, or creating small bites for your next gathering, these skewers deliver. They balance sweet, salty, savory, and tangy all in one neat bite.
Set out a tray, watch them disappear, and when your guests raves roll in, you’ll feel like a pro. And when you do make them, don’t forget to tag me or mention me in your post—I’d love to see your skewered creations!

