Let’s get one thing straight — I love a good sandwich. But sometimes, I don’t want to commit to an entire 12-inch sub that’s bursting at the seams and dripping on my lap. You know the type: the kind of sandwich that needs both hands, a stack of napkins, and an awkward lean-over-the-plate strategy. That’s where these Hot Italian Sub Sliders come in — they’re everything you crave in a loaded Italian sub, only smaller, neater, and way more party-friendly.
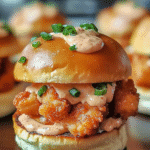
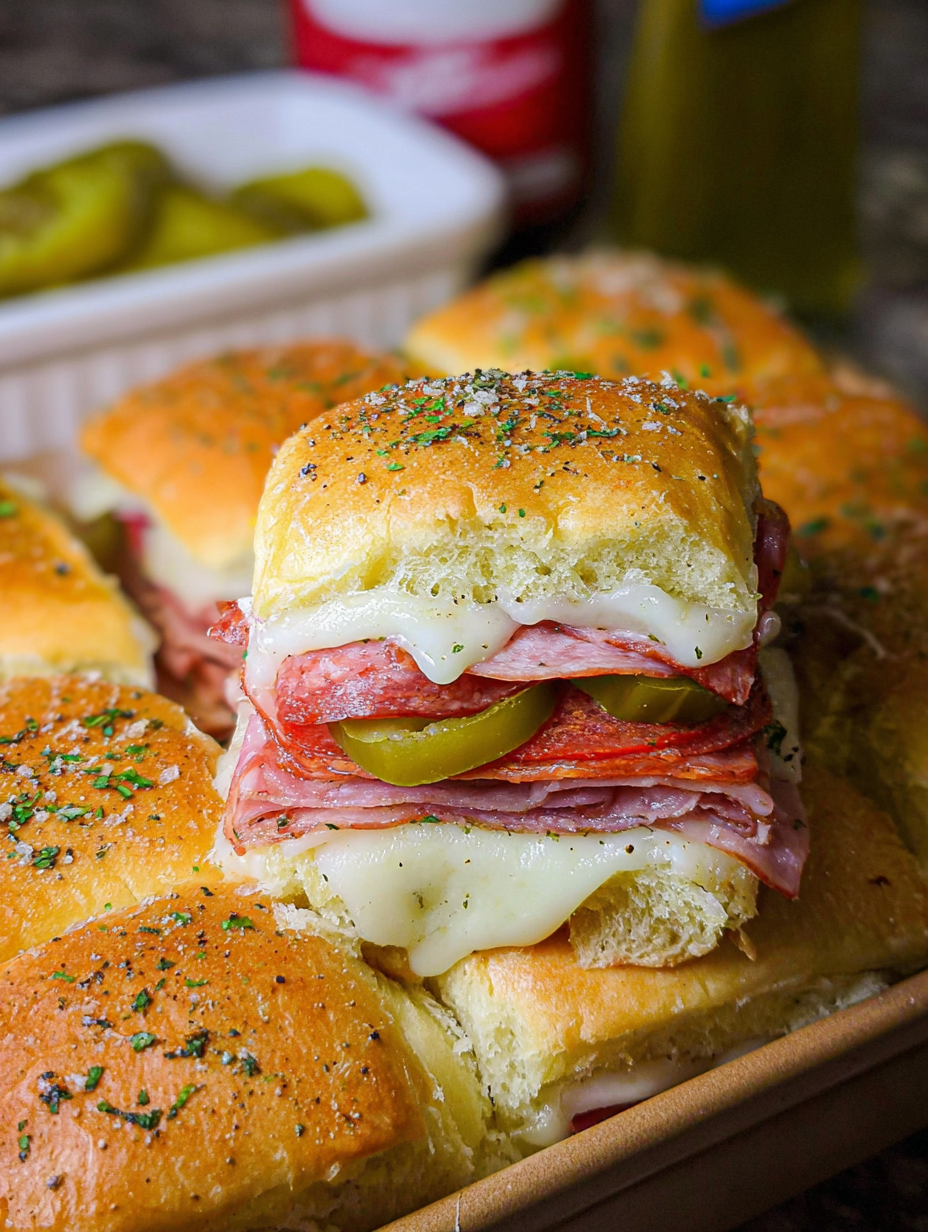
These bad boys are built on soft slider rolls and stacked high with spicy pepperoni, savory salami, smoky ham, and slices of melty provolone. A generous brush of garlicky herb butter over the tops transforms them into golden, buttery bites that disappear fast. I’m talking gone-in-sixty-seconds level.
They’ve saved me countless times — last-minute guests? Boom. Game day snacks? Done. Weeknight dinner with no complaints from the kids? You bet. Whether you serve them as a main course, appetizer, or midnight snack, these sliders never fail to hit the spot. And best of all? You can make a full tray in about 30 minutes with minimal prep and maximum flavor.
So buckle up — we’re diving into melted cheese, bold deli meats, and pillowy soft buns that are ready to impress. Let’s make some Hot Italian Sub Sliders magic happen.
What’s on the Plate
Overview
Cuisine: Italian-American
Course: Appetizer, Snack, Party Food
Prep Time: 15 minutes
Cook Time: 20 minutes
Total Time: 35 minutes
Serving: Serves 8–10 (makes 12 sliders)
What’s in Every Bite (Approximate per slider)
Calories: 260 kcal
Carbs: 21g
Fats: 15g
Protein: 11g
Sugar: 3g
Sodium: 680mg
Total Recipe Cost (Approximate)
Total Cost: ~$12–14 USD
Per Serving: ~$1.25
Main Cost Factors: Deli meats, cheese, slider buns
The Story Behind the Flavor
Hot sub sandwiches have been a staple in American delis since the mid-20th century — but mini versions? That’s the modern cook’s genius. Sliders took off as trendy party fare because they’re easier to share, easier to customize, and faster to bake.
These Hot Italian Sub Sliders borrow inspiration from New Jersey and New York-style hoagies and cold cuts — think classic meats like salami, pepperoni, and ham stacked high. Instead of a cold sandwich, we bake them warm with bubbling cheese and an herby butter glaze. These are typically served at parties, tailgates, family dinners, or on busy weeknights when quick, satisfying comfort food is the name of the game.
Perfect For
- Game Day Snacks & Football Watch Parties
- These sliders were made for crowd-pleasing moments. Line them up hot out of the oven, and watch them disappear faster than a kickoff return. No utensils, no mess — just cheesy, meaty handheld bites perfect for halftime hunger.
- Holiday Spreads & Potlucks
- They’re festive, easy to transport, and always the first tray to go. Whether it’s a Christmas buffet, a Friendsgiving appetizer table, or your neighbor’s New Year’s bash, these sliders bring the “wow” without the work.
- Quick Weeknight Dinners That Feel Indulgent
- When you’re short on time but still want something hearty, these hit the sweet spot. They come together in 30 minutes but taste like you spent hours in the kitchen. Serve with chips or salad and you’ve got dinner done.
- Picnics & BBQs — No Forks Required!
- Sliders are the MVP of outdoor eating. Stack them in a container, wrap in foil, and they’re ready to serve at the park, the beach, or your backyard grill-out. No slicing or plating — just peel, pull, and enjoy.
- School Lunches Your Kids Will Actually Eat
- Toss one or two into a lunchbox and you’re the hero of the cafeteria. Warm or cold, these sliders are kid-approved, customizable, and just the right size for little hands and big appetites.
Why You’ll Love This Recipe
- Melty, Meaty, Cheesy Heaven in Every Bite
- These sliders are the ultimate comfort food — hot layers of savory deli meat, gooey melted cheese, and buttery glazed buns baked until golden and irresistible. It’s everything you crave in a classic Italian sub, miniaturized and packed into perfect palm-sized bites.
- Ready in Just 30 Minutes
- Whether you’ve got surprise guests, hungry kids, or a game-day crowd, these sliders are a lifesaver. From prep to plate in half an hour, they’re fast enough for weeknights and impressive enough for parties.
- No Slicing, No Fuss
- These are grab-and-go heroes. You don’t need to carve, assemble, or plate anything fancy — just bake and serve. They come out of the oven beautifully portioned and ready to feed a crowd with zero hassle.
- Totally Customizable
- Love pepperoni? Add it. Prefer turkey and provolone? Go for it. Want to swap the glaze or go spicy? Be my guest. These sliders are a blank canvas for your favorite meats, cheeses, and sauces.
- Freezer-Friendly & Meal Prep Gold
- Make a batch ahead, freeze them unbaked or baked — they reheat beautifully. These are ideal for prepping lunches, make-ahead dinners, or feeding a hungry bunch at a moment’s notice.
Ingredients You’ll Need
Core Ingredients:
1 package of slider rolls (12-count, Hawaiian or brioche)
8 slices provolone cheese
12 slices Genoa salami
12 slices pepperoni
6 slices deli ham
½ cup sliced banana peppers (optional but delicious)
¼ cup mayonnaise (or sandwich spread)
For the Butter Topping:
½ cup unsalted butter, melted
1 teaspoon garlic powder
1 teaspoon Italian seasoning
1 tablespoon grated parmesan cheese
Ingredient Highlights
Slider Rolls: Soft, slightly sweet rolls like Hawaiian or brioche work best.
Deli Meats: Go with spicy or mild — Genoa salami, deli ham, pepperoni… build your dream bite.
Cheese: Provolone melts beautifully, but mozzarella, Swiss, or pepper jack can add fun twists.
Banana Peppers: Tangy and sharp, they cut through the richness. Optional, but highly recommended.
Step-by-Step Instructions
1. Preheat and Prep
Preheat your oven to 350°F (175°C). Line a baking sheet with foil or parchment for easy cleanup.
2. Slice the Slider Rolls
Keep the rolls attached and slice them horizontally in half. Place the bottom half on your prepared sheet.
3. Layer the Fillings
Spread mayo on the bottom half. Then layer: ham, salami, pepperoni, cheese slices, and banana peppers.
4. Top It Off
Place the top half of the rolls back on. Press gently to compact.
5. Make the Butter Glaze
In a bowl, combine melted butter, garlic powder, Italian seasoning, and parmesan. Brush this over the top of the rolls — generously.
6. Bake
Cover loosely with foil and bake for 15 minutes. Uncover and bake another 5 minutes until tops are golden and cheese is melty.
7. Slice and Serve
Use a sharp knife to cut between the rolls. Serve hot and watch them disappear.
Pro Chef Tips
- Use a serrated knife for clean slicing without squishing.
- Toast the bottom buns lightly before layering if you want a crisper base.
- Add pickles or jalapeños for a punch of flavor.
- Double the batch and freeze extras for later.
Recipe Variations
Turkey Pesto Sliders
Looking for a lighter twist that still packs serious flavor? Swap out the Italian meats for sliced deli turkey, then layer in provolone cheese and a generous smear of basil pesto. Add a thin tomato slice or baby spinach for extra freshness. Perfect for spring gatherings or a fresh party bite.
Spicy Italian Sliders
Craving some heat? Bring on the fire with hot capicola or spicy salami, pepper jack cheese, and a sprinkle of crushed red pepper or banana peppers. These are guaranteed to be the first sliders gone at any tailgate or game-day spread.
Vegetarian Version
Keep it meatless without sacrificing flavor. Roast red peppers until soft and sweet, then layer them with sautéed spinach or arugula and gooey mozzarella. A little garlic butter on the buns makes this one ultra-satisfying and crowd-friendly.
BBQ Italian Sliders
A smoky, sweet twist you didn’t know you needed. Mix just a spoonful of your favorite BBQ sauce into the melted butter topping or brush it onto the meat layer before baking. Add sharp cheddar or smoked provolone and serve with pickles on the side for bonus flavor.
Garlic Lover’s Dream
Up the garlic ante by mixing roasted garlic or garlic paste into the butter glaze. Serve with marinara or garlic aioli for dipping. Garlic breath? Worth it.
Breakfast Sliders
Add a scrambled egg layer, breakfast sausage or bacon, and a slice of cheese for a morning version that’s brunch-board ready. These freeze well too — breakfast meal prep, anyone?
Gluten-Free Version
Going gluten-free doesn’t mean skipping out on flavor — and these sliders are no exception.
Use Gluten-Free Buns: Start with certified gluten-free slider buns or small GF sandwich rolls. Look for ones that toast up well and hold their shape so you still get that soft, pull-apart texture.
Double-Check the Meats: While most deli meats are naturally gluten-free, it’s essential to check the labels for hidden additives or cross-contamination warnings. Opt for trusted brands that clearly label gluten-free options.
Butter & Seasonings: Unsalted butter is naturally GF, but if you’re using garlic powder, Italian seasoning blends, or pre-shredded cheese, check for anti-caking agents or wheat-based fillers.
Pro Tip: Toast your GF buns slightly before assembling to help them hold up to the butter glaze and melty cheese without getting soggy.
Now you’ve got party-perfect sliders everyone can enjoy — no gluten, no worries!
Kid-Friendly Version
Turning these sliders into a kid-approved hit is easier than you think — and you’ll still keep all the melty, gooey goodness.
- Keep It Mild: Skip the spicy meats like pepperoni or salami and go with kid-favorites like deli ham, turkey, or even thin-sliced chicken breast. Mild mozzarella or American cheese keeps things melty and mellow — perfect for picky eaters.
- Dippin’ Time: Serve the sliders with warm marinara, ranch, or even honey mustard on the side for dunking. Kids love having a sauce station to make it feel fun and interactive.
- Little Kitchen Helpers: Let the kids take part by brushing on the buttery glaze before baking. It’s a safe, simple job that makes them feel like the head chef.
- Bonus Tip: Make mini versions using Hawaiian rolls cut in half for little hands, or serve them slider-style with apple slices and baby carrots for a balanced plate.
- Kid-tested, lunchbox-approved, and perfect for parties or weeknight dinners.
Hot Italian Sub Sliders
Ingredients
Method
- Preheat your oven to 350°F (175°C). Line a baking sheet with foil or parchment for easy cleanup.
- Keep the rolls attached and slice them horizontally in half. Place the bottom half on your prepared sheet.
- Spread mayo on the bottom half. Then layer: ham, salami, pepperoni, cheese slices, and banana peppers.
- Place the top half of the rolls back on. Press gently to compact.
- In a bowl, combine melted butter, garlic powder, Italian seasoning, and parmesan. Brush this over the top of the rolls — generously.
- Cover loosely with foil and bake for 15 minutes. Uncover and bake another 5 minutes until tops are golden and cheese is melty.
- Use a sharp knife to cut between the rolls. Serve hot and watch them disappear.
Notes
Hot Italian Sub Sliders – Helpful Tips
Cooking Tips & TechniquesUse soft, pull-apart slider rolls (like Hawaiian or brioche) to hold in all that melty, savory goodness.
Layer deli meats like salami, pepperoni, and ham evenly so every bite has the perfect mix of flavor.
Don’t skip the cheese — provolone or mozzarella melts beautifully and gives that signature sub stretch.
Brush the tops of the buns with seasoned melted butter (with garlic, Italian herbs, and a touch of Parmesan) before baking for a golden, flavorful crust.
Cover with foil for the first half of baking, then uncover to crisp the tops without drying out the sliders. Serving Suggestions
Serve with warm marinara or spicy giardiniera on the side for dipping or drizzling.
Pair with Italian pasta salad, potato chips, or garlic knots for a crowd-pleasing platter.
Perfect for game day spreads, potlucks, birthday parties, or even a fun weeknight dinner.
Add a fresh green salad with balsamic vinaigrette to balance out the richness.
Serve with chilled lemonade, soda, or beer for casual entertaining. Make-Ahead & Storage
Make-Ahead: Assemble up to a day in advance and refrigerate covered. Bake just before serving for best texture.
Refrigerator: Store leftovers tightly wrapped in foil or an airtight container for up to 3 days.
Freezer: Freeze fully assembled (before baking) or baked sliders. Wrap tightly and store up to 1 month.
Reheat: Reheat covered in a 325°F oven until warmed through, or pop individual sliders in the toaster oven. Tasty Variations to Try
Spicy Kick: Add banana peppers, crushed red pepper, or pepper jack cheese for heat.
Veggie-Loaded: Include roasted red peppers, sautéed mushrooms, or spinach between meat layers.
Turkey Club Sliders: Use turkey, bacon, and Swiss with a smear of honey mustard.
Chicken Parm Sliders: Swap the deli meat for breaded chicken cutlets and marinara sauce.
Gluten-Free Option: Use gluten-free rolls and double-check deli meats and sauces for certified GF labels.
Taste What’s Next
Homemade Easy Cheesy Pizza Pockets
Crack Burgers
Lemon Basil Chicken Kebabs
or you Can Dig Deeper Recipes by clicking this: Appetizer, Breakfast, Lunch, Dinner, and Desserts.
Storage & Reheating
Store Like a Pro:
Got leftovers? Lucky you. Place any cooled sliders in an airtight container or wrap them individually in foil. They’ll keep well in the fridge for up to 3 days — making them perfect for a quick lunch or after-school snack.
Reheat for Max Flavor:
- Oven Method (Best Texture): Preheat your oven to 300°F, wrap the sliders loosely in foil, and warm for 10–12 minutes. This brings back that toasty exterior and melty center without drying things out.
- Microwave (Quick Fix): In a pinch? Pop a single slider in the microwave for 30–40 seconds. Cover with a damp paper towel to prevent it from drying out. It won’t be quite as crisp, but still totally delicious.
Freezing Tip: While these sliders are best fresh, you can freeze unbaked ones. Assemble the sliders without the glaze, wrap tightly, and freeze. When ready to bake, thaw overnight in the fridge, brush with butter, and bake as directed.
Equipment
- Serrated knife
- Baking sheet or 9×13-inch baking dish
- Mixing bowl
- Pastry brush
- Foil or parchment paper
Frequently Asked Questions (from People Also Ask)
Can I make Italian sliders ahead of time?
Yes! You can fully assemble them (minus the butter topping) and store covered in the fridge. Just brush with butter and bake when you’re ready to serve.
What are the best rolls to use for hot sliders?
King’s Hawaiian rolls are a favorite for their soft texture and slight sweetness. Brioche buns also work great and toast beautifully in the oven.
Can I freeze baked Italian sliders?
Absolutely. Let the sliders cool, wrap them tightly in foil, and freeze. Reheat in a 350°F oven, still wrapped, until hot throughout.
What’s typically on an Italian sub sandwich?
Classic ingredients include Genoa salami, ham, capicola, pepperoni, provolone cheese, banana peppers, and Italian dressing or mayo.
How do I keep my sliders from getting soggy?
Lightly toasting the bottoms before layering and not overdoing the mayo or peppers helps keep everything crisp.
Are sliders good for meal prepping lunches?
Definitely. Make a tray on Sunday, store them in the fridge, and reheat individual sliders for quick lunches throughout the week.
External Resources (Non-Recipe Sites)
USDA Food Safety Internal Temperature Guidelines
Guide to Sandwich Cheeses – Wisconsin Cheese
Conclusion
If comfort food had a mascot, it might just be these Hot Italian Sub Sliders. They’re cheesy, savory, warm, and bite-sized — making them the MVP of any snack table or weeknight dinner rotation. And the best part? You can customize them a million ways and still end up with something irresistibly good.
Whether you’re hosting a backyard bash or just need something delicious that even the picky eaters will devour, these sliders are your go-to. Easy to make, easy to eat, and even easier to love.
So go ahead — fire up that oven, layer on the good stuff, and let your kitchen smell like a deli in the best way possible. And when you nail that cheese pull? Snap a pic and tag me — I live for those moments. Happy cooking!